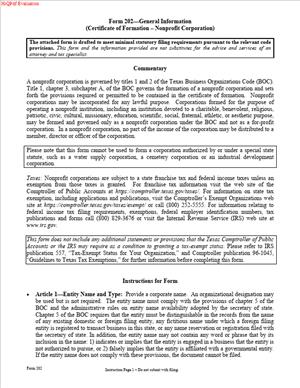
Form 202 – Certificate of Formation for a Nonprofit Corporation
Fill out nowJurisdiction: Country: United States | Province or State: Texas
What is a Form 202 – Certificate of Formation for a Nonprofit Corporation?
Form 202 is the legal document that creates a nonprofit corporation in Texas. When the state accepts this filing, your nonprofit comes into existence as its own legal entity. The form sets your organization’s legal name, registered agent and office, governance structure, purpose, whether you will have members, and how assets will be handled if the organization dissolves. It also records the organizer’s signature and the filing’s effective date.
You use this form to separate your nonprofit’s activities from you and your co-founders. It gives you a corporate structure that can own property, sign contracts, hire staff, and carry insurance. It also helps you limit personal liability for authorized nonprofit activities. Banks, donors, and grantors look for a filed formation certificate before they will open accounts, release funds, or sign agreements.
Who typically uses this form?
Founders of community groups, charitable initiatives, religious ministries, educational programs, arts organizations, booster clubs, health initiatives, trade or professional associations, and neighborhood or property owners’ associations. Law firms, accountants, and consultants often prepare it for clients. Executive directors and board members may review and approve the content before filing.
You need this form when you want to turn an idea or existing unincorporated group into a Texas nonprofit corporation. It is the first legal step after choosing your name and governance approach. If you intend to pursue tax-exempt recognition under federal or state law, you still start with this filing. Many exemptions and registrations ask for a file-stamped Certificate of Formation as proof that your organization exists and is authorized to operate.
Typical usage scenarios include launching a new charity to run programs and accept donations, formalizing a youth sports league or arts collective to manage facilities and volunteers, incorporating a religious or educational ministry to operate programs and hold property, or setting up a professional association to collect dues and offer member services. Homeowners’ associations commonly incorporate as nonprofits as well. In each case, Form 202 is the base charter that makes the organization official under Texas law.
When Would You Use a Form 202 – Certificate of Formation for a Nonprofit Corporation?
You use Form 202 when you are creating a brand-new Texas nonprofit corporation. You complete it before you adopt bylaws, open a bank account, or sign major contracts. If you are converting from an informal group to a formal entity, you file Form 202 and then move your operations, contracts, and funds to the new corporation once formed.
If you are running programs and taking donations under your personal name, you should file Form 202 as soon as you intend to hire, sign leases, or apply for grants. If your group is about to receive a large gift, secure a facility, or employ staff, forming first gives you a structural foundation and liability protection. When you plan to request corporate sponsorships or public grants, you will almost always need a filed formation certificate.
If you operate a club or association with dues, events, or property, you use Form 202 to create a corporate home for those activities. If your board wants to adopt policies, set membership rules, and establish committees, filing Form 202 is the step that empowers you to do so under a clear governance framework.
If you are reorganizing an existing Texas nonprofit corporation, you do not use this form. Amendments, mergers, name changes, or reinstatements require different filings. Form 202 is for formation. If you are based in another state and want to operate in Texas, you also do not use Form 202. That is a separate registration. Use Form 202 when you are forming a Texas nonprofit corporation from scratch.
Legal Characteristics of the Form 202 – Certificate of Formation for a Nonprofit Corporation
Form 202 is legally binding because it is the state-approved charter for your nonprofit corporation. Once accepted by the filing office, it creates a legal person separate from its organizers, directors, and members. The corporation can then own property, enter into contracts, sue and be sued, and conduct activities in its own name. The form, together with Texas law, sets the outer boundaries of what the corporation can and cannot do.
Enforceability comes from compliance with required content and proper execution. The form must include a distinguishable name, a Texas registered agent and street address, a management structure with required directors, a lawful purpose, and a plan for distributing assets on winding up. The organizer must sign the form and affirm that the registered agent consented to serve. The filing becomes part of the public record. Third parties rely on it, so accuracy matters.
Your certificate and your bylaws work together. The certificate contains high-level, controlling terms: name, purpose, whether you have members, the minimum governance structure, and dissolution terms. Bylaws provide operational details: officer roles, director terms, elections, quorum, committees, and meeting procedures. If there is a conflict, the certificate controls. You can amend the certificate later, but amendments require formal action and a state filing.
The certificate also supports limited liability. Directors, officers, and members are not personally liable for corporate debts solely because of their roles. That protection depends on honest, lawful operation, proper separation of funds, and acting within authority. The certificate’s public statements set expectations. False statements can result in rejection, penalties, or loss of good standing.
If you plan to seek federal or state tax exemptions, the certificate should align with those requirements. This often means limiting the purpose to charitable, religious, educational, or similar activities and adding a clause that prohibits private benefit. You also include a dissolution clause directing assets to another qualifying entity or a public purpose. Place these provisions in the purpose and supplemental sections. Doing so avoids re-filing later.
Finally, the certificate designates your registered agent, which ensures a reliable channel for official notices and legal papers. If your registered agent or registered office changes, you must update that information with a separate filing. Keeping this current protects your ability to receive critical notices and preserves due process.
How to Fill Out a Form 202 – Certificate of Formation for a Nonprofit Corporation
Approach the form in a sequence. You will move from name to governance to purpose to signatures. Keep your sentences short and your details precise. Here is a clear path through each section.
Step 1: Gather key information before you start
You need your nonprofit’s proposed name, a Texas street address for your registered office, a consenting registered agent, the names and addresses of at least three initial directors, a clear statement of purpose, whether you will have members, your dissolution plan, your organizer’s name and address, and your desired effective date.
Step 2: Complete Article 1 — Entity Name and Type
Enter your exact corporate name. Use upper and lower case as you want it to appear. The name must be distinguishable from other entities on record in Texas. Avoid words that imply a purpose you are not authorized to pursue. For nonprofits in Texas, you do not have to include “Inc.” or “Corporation,” though you may. Examples: “Hill Country Literacy Alliance” or “Metro Arts Collective, Inc.” If you have a name that is very similar to an existing record, adjust it now to avoid rejection.
Step 3: Complete Article 2 — Registered Agent and Registered Office
A registered agent accepts legal papers and official mail for the corporation. You must list a person who is a Texas resident or a company authorized to serve as a registered agent in Texas. Obtain the agent’s consent before filing. Enter the agent’s name and the registered office’s physical street address in Texas. A P.O. Box is not allowed for the registered office. The registered office must be a physical location where the agent can receive hand-delivered documents during business hours. Confirm the agent’s name is spelled correctly and the street address includes suite or unit numbers if needed. The form includes a statement that the agent consented. By signing, you affirm that you consent.
Step 4: Complete Article 3 — Management
Texas nonprofit corporations are managed by a board of directors unless the certificate provides otherwise. List the number of initial directors. Texas requires at least three directors for a nonprofit corporation. Enter the name and address of each initial director. Use a reliable mailing address. If you have more directors than the space allows, add a separate page titled “Attachment to Article 3 — Initial Directors,” and list the remaining names and addresses. Director addresses help verify identity and ensure notice. These initial directors serve until successors are elected as your bylaws provide.
Step 5: Complete Article 4 — Purpose
State a specific but flexible nonprofit purpose. Keep it clear and lawful. Examples include “The corporation is organized to support science education for youth in Texas” or “The corporation is organized to provide food assistance and related services to low-income families.” If you plan to seek federal tax-exempt status as a charitable or religious organization, add language that limits activities to exempt purposes and prohibits private benefit. You can include this limitation here or in the supplemental provisions. Avoid broad commercial language. Your purpose guides what you can do and how grantors view you.
Step 6: Complete Article 5 — Members
State whether the corporation will have members. Many nonprofits in Texas operate without statutory members. If you select “no members,” the board governs and elects directors. If you select “members,” your bylaws must define membership classes, rights, and voting. Choose the model that fits your governance vision and your stakeholders’ expectations. If donors and participants need a vote, choose members and define their powers. If you want a board-led structure, choose no members.
Step 7: Complete Article 6 — Asset Distribution on Winding Up
State how assets will be distributed if the corporation dissolves. If you plan to seek charitable tax-exempt recognition, direct assets to another nonprofit with similar purposes or to a governmental unit for public purposes. A clear, compliant clause is essential. Example: “On winding up, the assets of the corporation remaining after payment of debts shall be distributed for one or more exempt purposes, or to a governmental unit for a public purpose.” Avoid any clause that allows distribution to private persons beyond fair payment of debts.
Step 8: Add Supplemental Provisions/Information.
Use this section to include important clauses that do not fit elsewhere. Common additions include:
- A prohibition on private inurement and excessive benefit.
- A restriction on political campaign activity, with limited lobbying if permitted by law.
- Indemnification and limitation of liability for directors and officers to the extent allowed by law.
- A statement that the corporation has perpetual duration.
- Membership details, if you choose to have members (classes, voting rights, quorum).
- A requirement to adopt a conflict-of-interest policy.
- A statement that no part of the net earnings will inure to any private shareholder or individual.
Draft these provisions in clear, plain language. If your bylaws will contain operational details, avoid duplicating them in the certificate. The certificate should set high-level boundaries and structural rules.
Step 9: Identify the Organizer
The organizer prepares, signs, and submits the certificate. This can be a founder, an attorney, or another trusted person. Enter the organizer’s name and address. Only one organizer is required, though you may list more. The organizer does not have to be a director or officer. The organizer’s role ends once the filing is accepted unless the organizer also serves in another capacity.
Step 10: Choose the Effectiveness of Filing
You can choose for the filing to take effect when the state files it or on a delayed effective date not more than ninety days from filing. Choose a delayed date if you need to coordinate insurance coverage, funding releases, or a public launch. If you need immediate existence to sign a lease or receive funds, choose effectiveness on filing. If the form allows you to specify a time, include the time with the date.
Step 11: Execution (Signatures)
The organizer must sign the certificate. Print the organizer’s name below the signature. Date the document. A notary is not required. By signing, the organizer affirms the truth of the information and the registered agent’s consent. If you have multiple organizers, you may include multiple signature blocks, but only one is required.
Step 12: Attach Schedules if Needed
If you ran out of space for directors or supplemental provisions, include a clearly labeled attachment. Use headings that match the article you are extending (for example, “Attachment to Article 3 — Initial Directors”). Number the pages. Make sure your attachments are legible and consistent with the main form. Do not attach bylaws; they are internal records, not part of the filing. Do not attach the registered agent’s consent; retain it with your records.
Step 13: Review for Accuracy and Consistency. Confirm that the name matches across all pages. Check that the registered office is a Texas street address. Verify that you listed at least three directors. Ensure the purpose and dissolution clauses align with your planned activities. Make sure the members’ selection matches your governance plan. Confirm that your supplemental provisions do not conflict with the core articles.
Step 14: Prepare to File and Pay the Fee
Ensure you have the most current version of the form. Confirm the required filing fee. You can file by mail or online, depending on your preference. Keep a copy of everything you submit. If you need a certified copy after filing, request it at submission or later. A certified copy is often helpful for bank accounts and grants.
Real-world example
You and two colleagues plan to run a literacy program. You choose the name “River City Literacy Project.” You confirm that the name is distinguishable. You designate a trusted Texas resident as your registered agent and obtain written consent. You list three directors with mailing addresses. You state a purpose focused on providing adult literacy education. You select “no members” to keep governance board-led. You include a dissolution clause directing assets to another literacy nonprofit. In supplemental provisions, you add language prohibiting private benefit and limiting political activity. One organizer signs and files. You receive confirmation of filing. You then adopt bylaws, hold an initial board meeting, and open a bank account using the file-stamped certificate.
Another example: A neighborhood association wishes to formalize. It selects a name and appoints a commercial registered agent. It lists five initial directors. It selects “members” because homeowners will vote on budgets and board elections. The supplemental provisions outline classes of members and quorum basics, while leaving procedural details to the bylaws. The dissolution clause directs assets to a local government for public improvements. After filing, the board adopts detailed bylaws to administer dues and meetings.
Common pitfalls to avoid
choosing a name too similar to an existing entity, listing a P.O. Box as the registered office, failing to obtain registered agent consent, listing fewer than three directors, using an overly broad or commercial-sounding purpose, omitting the dissolution clause, or trying to place detailed bylaw rules in the certificate. Keep the certificate clean and structural. Keep operational rules in the bylaws.
Once filed, store the file-stamped certificate with your organizational records. Keep your registered agent consent, bylaws, initial resolutions, and director consents together. Schedule your first board meeting to adopt bylaws, elect officers, and authorize banking. If you plan to seek tax-exempt recognition or state tax benefits, prepare those applications using your filed certificate as proof of formation.
Legal Terms You Might Encounter
- A nonprofit corporation is a legal entity you form to carry out a purpose other than distributing profits to owners. When you file this form, you create that entity and define how it operates.
- A certificate of formation is the document that brings your nonprofit to life. This form is the certificate. It sets your name, purpose, governance, and key contact details.
- A registered agent is the person or company you name to receive legal papers for the nonprofit. You must list an agent and a street address in the state on this form. You also confirm the agent has agreed to serve.
- A registered office is the physical street address where the agent receives documents. You enter this address on the form. Don’t use a P.O. Box by itself.
- An organizer is the person who signs and submits the certificate of formation. The organizer does not have to be a director or officer. Their role is to execute and file this form.
- Members are the individuals or entities that can have voting rights in a nonprofit. The form asks if you will have members. If you choose “no members,” the board manages the nonprofit.
- The board of directors is the governing body that manages the nonprofit. The form lets you either list the initial directors or state that members will manage the nonprofit. Listing initial directors is common and practical.
- Supplemental provisions are extra rules you add to tailor your nonprofit. You can include tax-exempt purpose language, limits on activities, conflict-of-interest terms, or dissolution clauses. The form provides space for these additions.
- Purpose is the reason your nonprofit exists. You will state your purpose within the form. If you plan to seek federal tax-exempt status, use clear charitable, educational, or similar language.
- Dissolution provisions explain where your nonprofit’s assets go if it winds down. You add this in the supplemental section. For charities, assets usually go to another nonprofit with a similar mission.
- Indemnification is protection for directors and officers from certain liabilities. If you want indemnification rules, place them in the supplemental provisions or your bylaws.
- An effective date is when your formation takes effect. It can be the date of filing or a future date you specify. You can request a delayed date directly in the form.
FAQs
Do you need to list directors in the form?
You have two options. You can list initial directors or state that the nonprofit will be managed by its members. Many nonprofits list at least three directors at formation to support governance and future tax-exempt filings. If you plan to apply for a federal tax exemption, a defined board often helps.
Do you have to have members?
No. You can choose to have members or not. If you select “no members,” the board manages the nonprofit. If you select “members,” your bylaws should define member rights, including voting and removal procedures.
Do you need the registered agent’s consent?
Yes. You must obtain the agent’s consent before you file. The form requires you to confirm that the agent agreed to serve. Keep a signed or electronic consent with your records. You typically do not submit the consent with the filing.
Do you need to add special language for 501(c)(3)?
If you plan to seek federal tax-exempt status, include purpose and dissolution language that match federal requirements. Use the supplemental provisions section to add limits on political activity and the asset dedication clause. Doing this now prevents amendments later.
Do you need bylaws before you file?
Bylaws are not filed with this form. Still, you should draft them early because they guide elections, meetings, officer roles, and membership (if any). Adopt bylaws at your first organizational meeting after filing.
Do you have to use a specific naming format?
Your name must be distinguishable from other entities on state records and must follow state naming rules. Avoid words that imply a different purpose or that require prior approval. If you want to use a name later in public, consider checking availability before filing.
Do you need a street address for the registered office?
Yes. The form requires a physical street address in the state for the registered office. A P.O. Box alone is not acceptable. You can add a mailing address elsewhere if needed, but the registered office must be a street address.
Do you have to wait for tax-exempt approval before filing the form?
No. You form the nonprofit first with this certificate of formation. After the state accepts your filing, you can apply for a federal tax exemption and any applicable state tax exemptions. Add the required tax exemption language to the certificate now to avoid delays later.
Checklist: Before, During, and After the Form 202 – Certificate of Formation for a Nonprofit Corporation
Before signing
- Confirm your nonprofit’s name is available and compliant with state rules.
- Decide if you will have members or no members.
- Choose your governance structure: list initial directors or management by members.
- Identify at least three potential directors if you plan to list a board.
- Select a registered agent and obtain written or electronic consent.
- Verify a physical street address for the registered office in the state.
- Draft your purpose statement aligned with your mission.
- Prepare supplemental provisions for tax-exempt language, dissolution, and any governance limits.
- Collect full names and street addresses for initial directors (if you will list them).
- Decide on the effective date (on filing or a delayed date).
- Gather the organizer’s name and address.
- Review your draft bylaws to ensure they align with the certificate.
- Plan your initial organizational meeting agenda (adopt bylaws, elect officers).
- Set aside the filing fee and payment method.
During signing
- Verify the exact nonprofit name as it appears on the form.
- Confirm the registered agent’s full legal name and street address.
- Check that the registered office address is a physical location in the state.
- Double-check the purpose statement for clarity and tax-exempt alignment.
- Confirm whether you selected “members” or “no members.”
- If listing directors, verify full names and addresses for each person.
- Review supplemental provisions for completeness and consistency.
- If using a delayed effective date, ensure the date is correct and clear.
- Confirm the organizer’s details and signature.
- Recheck all addresses and spellings for accuracy and consistency.
After signing
- File the certificate of formation with the state filing office.
- Pay the required filing fee and retain the receipt.
- Wait for approval and obtain the filed or stamped copy.
- Store the filed certificate in your corporate records book.
- Schedule and hold your organizational meeting to adopt bylaws and appoint officers.
- Apply for a federal EIN for banking and tax filings.
- Prepare federal and state tax exemption applications, if applicable.
- Open a bank account with your EIN and formation documents.
- Set up a registered agent consent record in your files.
- Add compliance reminders for any periodic state reports and deadlines.
- Establish internal recordkeeping for minutes, resolutions, and policies.
- Share the field certificate with your board and key advisors.
Common Mistakes to Avoid
- Don’t forget the registered agent’s consent. If you file without consent, your agent may resign, and you could miss legal notices. That can lead to default judgments and compliance headaches.
- Don’t use a P.O. Box as the registered office. The state requires a physical street address for service of process. Your filing can be rejected or delayed if you don’t provide it.
- Don’t leave out tax-exempt language if you plan to seek 501(c)(3). If you skip the purpose and dissolution clauses now, you may need to amend later. Amendments cost time and money and can delay your tax-exempt status.
- Don’t list fewer directors than your governance needs. A strong board helps with banking, grants, and tax-exempt filings. Thin boards slow decisions and can raise red flags during reviews.
- Don’t create conflicts between the bylaws and the certificate. Inconsistency leads to governance disputes and rejected filings for later changes. Align your supplemental provisions and bylaws before you file.
What to Do After Filling Out the Form
File the certificate
- Submit your signed certificate and pay the filing fee to the state filing office. You can file online, by mail, or in person, depending on available methods.
- If you included a delayed effective date, note it on your internal calendar.
Confirm acceptance
- Wait for state approval. Once accepted, secure a filed or stamped copy.
- Check all details on the filed copy. If you spot an error, consult the options to correct it promptly.
Set up your corporate records
- Create a records book (digital or physical). Include the filed certificate, registered agent consent, and any name approvals.
- Add a section for minutes, resolutions, policies, and key contracts.
Hold your organizational meeting
- Adopt bylaws that match your certificate and mission.
- Elect or confirm directors if not already named.
- Appoint officers (president, secretary, treasurer, or similar roles).
- Approve banking resolutions and authorize signers.
- Approve key policies, such as conflicts of interest and document retention.
Obtain your EIN and open a bank account
- Apply for a federal EIN. You will need the EIN to open a bank account and file tax forms.
- Bring the EIN letter, filed certificate, and resolutions to the bank.
Align for tax-exempt status
- Prepare your federal tax exemption application if you plan to qualify as tax-exempt.
- Make sure your purpose and dissolution clauses in the certificate match the standards you intend to meet.
- Apply for any state-level tax exemptions you qualify for after the entity is formed.
Address licenses and compliance
- Review whether your activities require local permits, licenses, or zoning approvals.
- If you will hire staff, set up payroll and employment registrations as needed.
- If you plan to fundraise, review any state or local rules that may apply to your activities.
Establish ongoing governance
- Set a regular board meeting schedule and record minutes.
- Adopt simple financial controls and spending limits.
- Create an annual compliance calendar for reports, meetings, and filings.
Monitor your registered agent and office
- Keep your registered agent appointment current at all times.
- Update the state filing office if your agent or registered office changes. Use the appropriate change filing and pay any fee.
Plan for amendments and updates
- If your name, purpose, or governance structure changes, file a certificate of amendment.
- If you add or remove directors, reflect changes in minutes and internal records. Update public filings when required.
Share and store documents
- Provide the filed certificate and bylaws to your board and key staff.
- Store all documents securely with backup copies. Keep a centralized filing system so directors can access records.
Set policies for donations and grants
- If you solicit donations, prepare gift acknowledgment procedures.
- Document restricted funds and grant reporting responsibilities.
Track reporting obligations
- Watch for state periodic reports and notices. File them by the due date.
- Keep your EIN, bank, insurance, and registered agent information up to date.
By following these steps, you move from formation to active operations with clear governance, clean records, and a path to tax compliance.
Disclaimer: This guide is provided for informational purposes only and is not intended as legal advice. You should consult a legal professional.