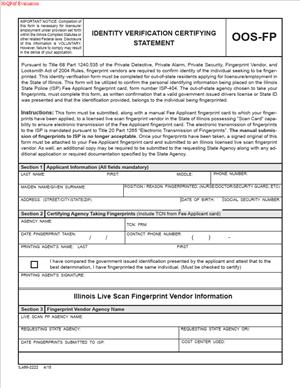
Identity Verification Certifying Statement – OOS-FP
Fill out nowJurisdiction: Country: USA | Province or State: Illinois
What is an Identity Verification Certifying Statement – OOS-FP?
This form confirms your identity when you submit fingerprint cards from outside Illinois. It supports a fingerprint-based background check for an Illinois professional license. It is used when you cannot visit an Illinois live scan vendor. It links your printed fingerprint cards to your license application with a signed certification.
The form belongs to the Illinois Department of Financial and Professional Regulation. The agency uses it to ensure proper identity checks. It requires a qualified fingerprint technician to verify your identity. The technician must view your government-issued photo ID. They then sign the form to certify the match. This step creates a clear chain between you and the prints.
You typically use this form if you live or travel outside Illinois. It applies to applicants for many regulated professions. You may be a nurse moving from another state. You may be a real estate broker relocating to Illinois. You could be a pharmacist completing an endorsement. You might be restoring a lapsed license from out of state. If your profession requires fingerprints and you are not in Illinois, this form is likely required.
The form works with FD-258 fingerprint cards. Out-of-state card printing does not have the same on-site verification as an Illinois live scan. The certifying statement fills that gap. It lets a trained person attest that the prints belong to you. It also gives the agency contact details for the fingerprinting site. That makes follow-up easier if needed.
You need this form because the agency must trust the prints. Without identity verification, the prints may be rejected. The form also reduces delays. It ensures the card-scan vendor can process your packet. It prevents the vendor from returning your cards for missing certification.
Typical usage scenarios
You schedule an appointment with a law enforcement agency or an authorized fingerprint provider near you. You bring your FD-258 card and this form. The technician checks your ID. They take your fingerprints on the card. They complete and sign the certification. You mail the card and the signed form to the instructed vendor. The vendor submits your prints for state and federal checks. The results are posted to your licensing file.
In practice, the form serves three goals. It protects the public by preventing identity mix-ups. It speeds review by giving exact contact data for the print taker. And it aligns your application with a valid background check. If you want your license issued without delays, complete this form with care.
When Would You Use an Identity Verification Certifying Statement – OOS-FP?
You use it when you need fingerprints for an Illinois license and you are outside Illinois. This is common for applicants relocating to Illinois. It also applies to those on temporary assignment out of state. Military spouses often use it. So do traveling nurses and telehealth professionals. Students completing clinical hours out of state may use them, too. If you cannot appear at an Illinois live scan site, you can use this form with fingerprint cards.
You also use it when restoring a license that requires new fingerprints. Some restorations require a new background check. If you live out of state, this form allows you to complete that step. It can also apply when a prior fingerprint submission failed. If the vendor asks you to reprint by card, include this form again.
Typical users include nurses, physicians, physician assistants, pharmacists, dentists, real estate brokers, appraisers, social workers, counselors, and many other licensed groups. The common thread is a fingerprint requirement and an out-of-state location. If your profession does not require fingerprints, you will not need this form.
Consider a few scenarios. You are a nurse in Texas who accepted a job in Chicago. Your application requires fingerprints. You will not be in Illinois for two months. You book fingerprinting at your local sheriff’s office. You bring this form. The officer verifies your identity and signs. You mail the card and form to the vendor. You stay on track for your Illinois start date.
Another example. You are a real estate managing broker currently in Florida. Your Illinois renewal was inactive for years. You apply to restore. The agency requests fingerprints. You cannot fly to Illinois this month. You use this form with your FD-258 cards and submit it by mail.
One more example. You are a pharmacist living near the Missouri border. The nearest Illinois live scan site is hours away. A Missouri police department offers ink fingerprinting. You use that service. You bring this form to confirm identity. You mail the results to the card-scan vendor as instructed.
If you are physically in Illinois and can access Live Scan, you do not use this. Live scan includes identity verification on-site. The OOS-FP process is for card-based submissions only. Choose the path that matches your location and the agency’s instructions.
Legal Characteristics of the Identity Verification Certifying Statement – OOS-FP
This form is a sworn certification that supports a background check. It is not a contract. But it carries legal weight. The technician’s signature confirms they verified your identity. The agency relies on that attestation to accept your prints. False statements can lead to consequences. They may delay or deny your license. They may trigger discipline or referral to law enforcement. Your signature also confirms your information is true and complete.
Enforceability comes from several features. The form contains clear certification language. It requires printed names, dates, and contact details. The fingerprint technician signs and dates the statement. The information must match the fingerprint card. The card must include your identifiers and the technician’s details where required. The agency can reach the technician using the form if needed. These pieces create a verifiable chain of custody.
The form must be complete and legible. Missing signatures make it invalid. Missing dates can cause rejection. Names must match your application exactly. If you used a maiden name on your card, note it. If you recently changed your name, include both as instructed. Inconsistent data can slow processing or cause a second printing.
The form sits within the licensing process. Statutes and rules allow fingerprint checks for many professions. Your application authorizes the check. Your form and cards deliver the data to the vendor. The vendor submits your prints to the proper agencies. The results return to the licensing file. The agency then uses those results in its decision.
Privacy matters here. Fingerprint results include sensitive data. The agency uses the results for licensing purposes. Security rules apply to storage and access. Do not share your TCN or similar numbers publicly. Keep copies of your form and mailing receipt, but secure them. Only send copies of your ID as instructed.
Note one more point. The agency may reject poor-quality prints. In that case, you must reprint and resubmit. The form remains part of the record. The agency may ask for a new form with new cards. Follow any reprint instructions exactly. Do not mail duplicate sets unless asked.
How to Fill Out an Identity Verification Certifying Statement – OOS-FP
Set aside 20 minutes to complete the form. Gather your documents first. You will need a valid government photo ID. Acceptable examples include a driver’s license or a passport. Ensure the ID is not expired. Bring a photocopy to attach. Have your FD-258 fingerprint card ready. Use black ink for all entries. Print clearly in block letters.
Step 1: Confirm you should use this form.
You are outside of Illinois and need fingerprints for a license. Your profession requires a fingerprint-based background check. You cannot access an Illinois live scan site. If you meet those facts, proceed. If not, stop and use the in-state live scan process.
Step 2: Complete your applicant information at the top.
Enter your full legal name. Include any suffix, like Jr. or Sr. Do not use nicknames. Add all other names used, if the form asks. Enter your date of birth in MM/DD/YYYY format. Provide the last four digits of your Social Security number if required. If you do not have a Social Security number, follow the agency’s instructions. Do not guess or invent a number.
Step 3: Provide your contact details.
Enter your mailing address, city, state, and ZIP code. Use an address where you can receive mail reliably. Enter your phone number and email. The vendor or the agency may contact you if there is a problem. Keep this information current. If you move, update your application separately.
Step 4: Identify your profession and application.
Enter your profession name. Examples include Registered Nurse, Pharmacist, or Real Estate Broker. Enter your application type, such as initial, endorsement, or restoration. If you have an application or file number, include it. This helps link your prints to your record.
Step 5: Read the applicant acknowledgment.
Some versions include a short statement above your signature line. It confirms the accuracy of your data. It also acknowledges the background check requirement. Sign and date where indicated. Use blue or black ink. Your signature must match your name on the form.
Step 6: Prepare your ID for the technician.
Bring your original, unexpired, government photo ID. Make a clear photocopy to attach to the packet if instructed. Do not staple through critical text. Paperclip items if possible. Keep the original with you.
Step 7: Arrange your fingerprinting appointment.
Choose a law enforcement agency or an authorized fingerprint provider. Confirm they will take ink fingerprints on FD-258 cards. Confirm they will sign a certification verifying your identity. Bring the form and the card to the appointment. Ask them to use flat, rolled prints as required. Follow their instructions to ensure quality.
Step 8: Have the technician complete the certifying section.
This is the heart of the form. The technician must view your photo ID. They should enter the ID type, number, and expiration date if requested. They must print their name and title. They must list their agency or company name. They must provide a business address and phone number. They must sign and date the certification. The signature must be original and in ink. If the agency uses a seal, they may add it, if available. Do not sign for them. Do not leave this section blank.
Step 9: Complete the FD-258 card fully and correctly.
The technician should fill in any required fields. These fields include your name, aliases, date of birth, sex, height, weight, eye and hair color, place of birth, and address. Ensure information matches your application and this form. The technician should sign the card. You may also need to sign the card. The prints must be clear, without smudges. Ask for a second card as a backup, if allowed.
Step 10: Review the packet for completeness.
Check your name and date of birth on both the form and card. Confirm all signatures and dates are present. Confirm the technician’s contact details are readable. Ensure the ID copy is included, if required. Ensure any profession or application identifiers are present. Keep a full copy of the completed form for your records.
Step 11: Prepare mailing to the instructed card-scan vendor.
Out-of-state fingerprint cards do not go to the licensing agency. They go to the designated vendor named in your instructions. Include the following in the envelope: the completed and signed Identity Verification Certifying Statement, the FD-258 fingerprint card(s), any vendor payment or cover sheet if required, and a photocopy of your photo ID if instructed. Use a trackable delivery method. Keep the tracking number.
Step 12: Watch for confirmation and next steps.
Some vendors issue a transaction or tracking number after processing. Save it. Add it to your application if asked. The background check can take several weeks. Processing starts when the vendor scans your card. Your licensing file will reflect receipt of results when available.
Step 13: Respond to any reprint request quickly.
Card submissions sometimes fail due to print quality. Age, skin condition, and ink issues can affect clarity. If the vendor reports a rejection, schedule a reprint promptly. Repeat Steps 7–12. Include a new certification. Do not send multiple sets unless requested. Duplicate submissions can cause confusion.
Parties involved are simple. You, the applicant, are one party. The fingerprint technician and their agency are the second. The certification clause is the technician’s attestation. It states they verified your identity with a valid photo ID. It links the identity check to the date of printing. The signatures confirm the attestation. Your signature confirms your information is true. The technician’s signature confirms they performed the verification.
Attach any schedules or supporting documents as instructed. Typical attachments are the FD-258 card and the photocopy of your ID. Some instructions include a vendor payment form. Some include a cover sheet with your profession and application details. Include what your instructions require. Do not include extra papers that the vendor did not ask for.
Here are practical completion tips. Use black ink and print clearly. Match names across the form, the card, and your application. Include all suffixes and hyphens. Write dates in the same format across documents. Do not leave required fields blank. If a field does not apply, write N/A if allowed. Do not cross out or white out entries. If you make an error, complete a new form. Do not staple over barcodes or critical text on any sheet.
Timing matters. Book your fingerprint appointment early in your application process. Mailing adds time. So does card scanning. Build in a buffer of two to four weeks. If you face a deadline, use express shipping. Keep your tracking and delivery confirmation. Check your application portal for status updates. If the status does not update after a reasonable time, follow up as instructed.
If your name changed recently, bring proof to your fingerprint appointment. A technician may want to see your updated ID. Ensure the name on your license application matches your current legal name. If your old name appears on records, include it in the aliases section if the form permits. This helps match results to your file without delays.
If you do not have a Social Security number, follow the agency’s current process. Some applicants may need an alternative affidavit. Do not leave required fields blank unless allowed. If the form asks for the last four digits and you do not have them, leave it blank and include a brief note only if instructions allow. Do not write zeros unless the instructions direct you to do so.
If you are outside the United States, use a passport for identification. Choose a fingerprinting site that uses standard FD-258 cards. Ensure they will complete and sign the certification. International mail can add delays. Use a reliable courier and track the package. Keep copies of every page you send.
Finally, read your copy of the completed form before you mail it. Ask yourself three questions. Does every required field have a clear entry? Are all signatures and dates present and legible? Do the form and the fingerprint card match on every key detail? If you can answer yes to all three, your packet is ready to go.
Legal Terms You Might Encounter
- You will see “applicant” or “licensee” on this form. That means you. You are the person seeking a license or maintaining a license. Use your full legal name exactly as it appears on your government ID and your application.
- “Identity verification” means proving you are who you say you are. On this form, you do that by confirming your legal name, date of birth, and other identifiers that match your ID and your application.
- A “certifying statement” is your promise that the information on the form is true and complete. When you sign this form, you certify under penalty of law that everything is accurate.
- An “attestation” is your sworn or affirmed statement of truth. When you attest, you declare the facts are correct to the best of your knowledge. This form requires your attestation in front of a notary.
- An “oath or affirmation” is the promise you make before signing. An oath invokes a pledge; an affirmation is a non-religious equivalent. Both carry the same legal weight. You can choose either when the notary asks.
- A “notary public” is an authorized official who verifies your identity and witnesses your signature. The notary completes the notary section, stamps or seals the form, and includes their commission details.
- A “jurat” is a notarial act where you swear or affirm the truth of the contents and sign in front of the notary. An “acknowledgment” only confirms you signed the document. This form typically needs a jurat because you are certifying facts, not just acknowledging a signature.
- “Government-issued ID” means an official photo ID from a government authority. Common examples include a driver’s license, state ID, passport, or military ID. The ID must be valid and unexpired when you sign.
- A “name discrepancy” is any difference between your ID, your form, and your application. It can be a nickname, a missing middle name, hyphen differences, or a recent name change. You must resolve discrepancies with documentation before filing.
- “OOS-FP” refers to out-of-state or foreign professionals. This signals the form is designed for applicants located outside Illinois or outside the United States when verifying identity.
- “Penalty of perjury” means there are legal consequences for false statements. If you provide inaccurate information or sign without proper identity verification, your application can be delayed, denied, or referred for enforcement.
FAQs
Do you need a notary from Illinois, or can you use a notary where you live?
You can use a notary where you are physically located when you sign. If you are outside Illinois, a local notary is acceptable as long as they follow their jurisdiction’s notary laws. Make sure the notary completes all required fields, uses the correct notarial act, and applies a seal or stamp if their jurisdiction requires it.
Do you need to sign in wet ink, or can you sign electronically?
Unless the instructions clearly allow electronic notarization, sign in wet ink in front of the notary. Electronic signatures are only valid if the whole notarial act is authorized as a remote online notarization under the notary’s rules. If remote online notarization is not clearly allowed, choose an in-person notarization with a physical signature.
Do you need to provide copies of your ID with this form?
You should have your valid government ID present for the notary. Some filings also require a legible copy of your ID. If a copy is requested, make sure the name, photo, and expiration date are clear. Do not obscure essential details. If an identification number is sensitive, ask the notary or filing office whether masking is acceptable before you alter the copy.
Do you need your name to match your application exactly?
Yes. Your legal name on the form must match your application and your ID. If you recently changed your name, include the supporting document that the instructions request, such as a marriage certificate or court order. If you use a hyphen or a middle name in one place, use it consistently everywhere.
Do you have to translate a non-English ID?
If your ID is not in English, the notary may require a passport or another ID that they can read. If the filing instructions ask for a translation, provide a clear, accurate translation by a qualified person. The goal is to allow the notary and the reviewing staff to confirm your identity without doubt.
Do you need to complete this form if you have already verified your identity for another agency?
Yes. This form is specific to your licensing process. Past identity checks do not replace this certifying statement. Complete and submit the form as part of your application or licensure requirements.
Do you need to submit the original document, or will a scan work?
Follow the submission method in your application instructions. If you are asked to upload, scan the entire form, including the notary seal, at high resolution. If you are asked to mail, send the original with the notary’s wet stamp or raised seal. Keep a copy for your records.
Do you need to redo the form if your information changes after signing?
Yes, if the change is material to your identity or the application. For example, a name change or an updated date of birth correction requires a new, notarized form. Minor typos that do not affect identity should still be corrected before filing to avoid delays.
Checklist: Before, During, and After the Identity Verification Certifying Statement – OOS-FP
Before signing
- Confirm the exact name you used on your application.
- Gather a valid, unexpired government-issued photo ID.
- If your name has changed, collect your supporting document.
- Confirm your date of birth, address, and any other identifiers the form requests.
- Check whether the form requires your application or file number.
- If you are outside the United States, identify a notary or an official authorized to administer oaths where you are.
- Ask the notary what ID they accept and whether they require a second ID.
- Review the form’s instructions for signature type: ink or electronic via remote notarization.
- Print the form single-sided if mailing is required.
- If you will upload, confirm the file format and size limits.
- Block uninterrupted time to sign in front of the notary.
During signing
- Write your legal name exactly as it appears on your ID.
- Enter your date of birth in the requested format.
- Fill every required field; do not leave blanks.
- Do not sign until the notary tells you to sign.
- Swear or affirm that your statement is true.
- Sign your usual legal signature consistently with your ID.
- Date the form in the notary’s presence.
- Ensure the notary completes the jurat or required notarial certificate.
- Verify the notary’s seal or stamp is legible and within the border.
- Confirm the notary includes their printed name, commission number, and expiration date if required.
- If any correction is needed, use a single line to strike through, then initial. Avoid white-out.
- Review the entire form for legibility and completeness.
After signing
- Make a clear copy or scan of the fully executed form.
- If mailing, place the original in a clean, flat envelope. Avoid folds that obscure the seal.
- If uploading, ensure the scan shows the entire notary area and seal.
- Submit the form with your application or as directed by your filing instructions.
- Label your copy with the signing date and any application number.
- Track delivery or confirm successful upload and keep proof.
- Monitor your application portal or email for deficiency notices.
- If a deficiency is issued, address it quickly. You may need to re-notarize.
- Store the original or a certified copy in a secure file for at least the duration of your application process and any renewal period.
- Update your records and notify the licensing staff if your name or identifying data changes after submission.
Common Mistakes to Avoid Identity Verification Certifying Statement – OOS-FP
Using a nickname or shortened name instead of your legal name
- Your signature and printed name must match your ID and application. If they don’t, staff may reject the filing. Don’t forget to use your full legal name, including hyphens and suffixes.
Signing before meeting with the notary
- Pre-signing invalidates the jurat. The notary must witness your signature. If you sign early, you will likely need to redo the form. Sign only when the notary instructs you.
Submitting with an expired or unclear ID
- An expired ID or an unreadable copy raises identity concerns. Your filing may be delayed or denied. Use a current, clear ID. If you include a copy, make sure it is legible.
Choosing the wrong notarial act
- Some notaries complete an acknowledgment instead of a jurat. That can cause rejection. Ask the notary to administer an oath or affirmation and complete a jurat certificate.
Leaving required fields blank or crossing out without initials
- Blank fields or messy corrections can trigger a deficiency. Complete every field. If you must correct, draw a single line through the error and initial neatly.
Missing or illegible notary seal
- A faint or missing seal looks invalid. The filing may be refused. Check the seal while still with the notary and ask for a clear re-seal if needed.
What to Do After Filling Out the Form Identity Verification Certifying Statement – OOS-FP
Attach the completed form to your application materials as instructed. If the instructions require a separate upload, submit it in the correct section so staff can match it to your file. If the instructions require mailing, include the original with the notary’s seal.
Confirm your submission method. If you upload, use a single PDF that includes every page and the full notary block. Name the file with your legal name and any application number. If you mail, use a trackable service and keep the receipt.
Verify receipt. Check your application status or watch for a confirmation. If you see no update after a reasonable period, contact the appropriate help channel listed on your application instructions. Have your application number handy.
Respond quickly to deficiency notices. If staff report a missing seal, a name mismatch, or an incomplete field, fix it fast. You may need a new notarization. Do not alter a notarized document after the fact.
Update your information if anything changes. If your legal name changes, or if you discover an error, prepare a corrected form. Get it re-notarized and submit it with a brief note referencing your application number and what changed.
Keep organized records. Store:
- A copy of the signed, notarized form.
- Proof of submission or mailing.
- Any supporting identity documents you provided.
- Notes on who you spoke with and when.
Plan for renewals or future filings. This form may be requested again if you apply for additional licenses or make material changes. Keep a checklist ready, so you can repeat the process smoothly.
If you are abroad, document the notary’s authority. Some reviews move faster if your notarization includes a clear seal and required details from the local authority. If the form is apostilled or authenticated by your local authority when needed, include that with your packet.
Maintain consistency across documents. Your application, identity form, and any supporting records should all display the same legal name and identifiers. Consistency speeds review and reduces questions.
Disclaimer: This guide is provided for informational purposes only and is not intended as legal advice. You should consult a legal professional.