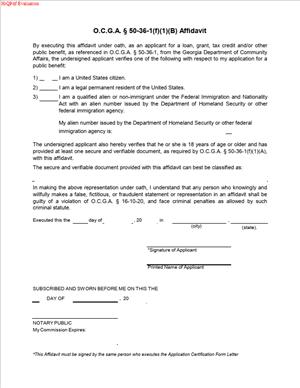
Affidavit for Public Benefit Eligibility (Georgia Department of Community Affairs)
Fill out nowJurisdiction: Country: The United States | Province or State: Georgia | County: Georgia
What is a Affidavit for Public Benefit Eligibility (Georgia Department of Community Affairs)?
This affidavit is a sworn statement you sign to confirm lawful presence in the United States. The Georgia Department of Community Affairs requires it before awarding a state‑administered public benefit. In plain terms, you use this form to certify you are a U.S. citizen or a lawfully present noncitizen. The agency uses it to decide if you qualify for a benefit that uses state or certain federal funds. Without it, your application will not move forward.
The form is short but formal. You must sign it under oath. A notary public witnesses your signature. You attach a copy of a secure, government‑issued ID. If you are not a U.S. citizen, you also list an immigration identifier. The agency may verify your information through lawful means. If the information does not match, the agency can deny or pause your benefit.
People who apply for housing or community programs use this affidavit often. You may see it with rental assistance, homeowner repair aid, down payment support, or disaster recovery help. Developers and property owners may need it for rehabilitation grants or loans. Nonprofits or businesses that apply for state‑administered aid can also need it. Each adult individual who seeks a benefit must complete their own affidavit. If you apply as a household, every adult household member may need to sign a separate form.
You need this form to meet a legal screening step. Georgia law requires an agency to confirm lawful presence before it gives certain benefits. The affidavit is the tool that makes that confirmation. You sign it once per benefit request unless the agency tells you to update it. If your status or legal name changes, you may need to submit a new affidavit.
Typical scenarios are straightforward. You are a tenant applying for rental help. Your case manager gives you the affidavit to sign and notarize. You attach your driver’s license and return it. You are a first‑time homebuyer seeking down payment support. The lender or program administrator includes the affidavit in your intake packet. You complete it before approval. You are a landlord seeking property improvement funding. The program requires your affidavit as part of the owner eligibility file. You submit it with your tax ID documents and proof of identity. You are a nonprofit receiving a grant. Your executive director signs an affidavit as the individual applicant on behalf of the organization, if required. The agency keeps the affidavit in the grant file.
The form protects you and the agency. It gives you a clear way to state your status. It gives the agency a clear way to document eligibility. It reduces delays by setting one consistent verification step. It also warns you about penalties for false statements. You sign under oath, so accuracy matters.
When Would You Use a Affidavit for Public Benefit Eligibility (Georgia Department of Community Affairs)?
You use this affidavit any time you request a state‑administered public benefit through this agency and the program requires verification of lawful presence. You encounter it during intake, eligibility review, or just before approval. If you submit an application online, you may still need to print, sign, notarize, and upload the affidavit. If you apply in person or by mail, the form is part of your packet. In both cases, the agency needs it on file before it can release funds or issue an award.
As a tenant, you use the affidavit when you seek help paying past‑due rent or utilities, or when you apply for relocation or homelessness prevention services funded by the agency. As a homeowner, you use it when you apply for mortgage, repair, or weatherization assistance administered by the agency or its partners. As a landlord or property owner, you use it when you apply for rehabilitation funding, gap financing, or compliance‑related assistance tied to state‑administered programs. As a developer, you may use it when you apply for a state‑managed loan connected to a housing project. As a business owner or nonprofit, you may use it when you seek a grant, loan, or contract that counts as a public benefit under state rules.
You also use the affidavit when you update your case. For example, your benefit is approved for a multi‑month period. The agency requests a new affidavit after a set time or when your legal name changes. You complete a fresh affidavit to keep your file current. If you move to a new property or switch programs within the agency, you may need a new affidavit. If your new program counts as a separate public benefit, the agency will request the form again.
There are times you do not need the affidavit. Some emergency aid or services may be exempt, but the agency tells you if that applies. Do not assume an exemption. If the form appears in your packet, plan to complete it. If you believe your service type is exempt, ask your case manager before you skip it. A missing affidavit is a common cause of delay.
You must use the affidavit even if you already provided an ID elsewhere in your application. The affidavit is not just an ID copy. It is a sworn statement the agency must retain. The notary seal and your signature under oath are the key elements. An uploaded driver’s license alone does not replace it.
Legal Characteristics of the Affidavit for Public Benefit Eligibility (Georgia Department of Community Affairs)
This affidavit is legally binding because you sign under oath before a notary. When you sign, you certify the truth of your statements. You also agree that the agency can verify your information within the bounds of law. False statements can lead to denial or termination of the benefit. They may also result in legal penalties. The notary seal shows that a commissioned officer verified your identity and witnessed your signature. That makes the affidavit admissible as evidence if the agency needs to prove what you swore.
Enforceability comes from several features. The form uses clear declarations. You must pick the status that applies to you. You provide an identification number if you are a noncitizen with lawful presence. You provide a copy of a secure, government‑issued ID. Your signature is notarized on a specific date and location. The notary confirms your identity by an approved ID or personal knowledge. The agency keeps the affidavit with your application records. If a later review occurs, the agency can show that it complied with eligibility verification requirements.
You should consider several legal points. First, the affidavit is a personal attestation. Only a natural person signs. If you apply as a business or nonprofit, an authorized individual signs on behalf of the organization, if the program requires it. That person states their own status under oath. Second, each adult applicant signs a separate affidavit. You cannot combine multiple adults on one form. This includes co‑owners, spouses, or adult household members. Third, minors generally do not sign. A parent or legal guardian completes the affidavit if the child is the technical applicant for a benefit. Your case manager will guide you in that case.
Name consistency matters. Your name on the affidavit must match your ID and your application. If you recently changed your name, include proof if the agency asks. If you go by a nickname, do not use it here. Use your full legal name. If your ID has a middle initial, include it. If your ID has a hyphenated surname, match it exactly.
The affidavit is not an immigration application. It does not change your status. It is only a certification of your status for this benefit. If you are a lawfully present noncitizen, you list the requested identifier and attach the document that shows lawful presence. If your status does not meet the program’s requirements, the agency must deny the public benefit. Do not guess at your status. If you are unsure, review your documents carefully. You can ask your case manager which document number they need, but they cannot give legal advice about your status.
The agency may verify the information you provide. If your information does not match records, the agency may request more proof. It may pause your application until the issue is resolved. If you refuse to complete the affidavit, the agency cannot approve the benefit. If you later correct an error, you can submit a new affidavit. The agency will restart or continue processing after it receives a valid form.
Keep a copy of your signed affidavit and attachments. Store it with your application. You may need it if staff changes or if you move to another related program. Having a copy helps you answer follow‑up questions quickly.
How to Fill Out a Affidavit for Public Benefit Eligibility (Georgia Department of Community Affairs)
Follow these steps to complete the affidavit correctly the first time.
1) Gather your documents.
- Bring a secure, government‑issued photo ID. A state driver’s license, state ID card, or passport are common. If you do not have a photo ID, ask your case manager what alternatives the agency accepts.
- If you are a lawfully present noncitizen, bring the document that shows your status. You will need the identifying number from that document.
- If you are signing for a business or nonprofit, bring proof of your authority to sign, if the program requires it.
2) Read the entire form before you write.
- Check the program name or benefit type listed on top. If it is blank, write the benefit you are seeking in the space provided, exactly as your case manager described it.
- Make sure you have the latest version provided by the agency. Do not edit the form language.
3) Complete the applicant information section.
- Print your full legal name exactly as shown on your ID. Include your middle name or initial if it appears on your ID.
- Provide your date of birth. Use the format shown on the form.
- List your residential address. Use your current address. If you are experiencing homelessness, use the address guidance provided by your case manager.
- Add contact information. Provide a phone number and email you check often.
4) Identify your role and relationship to the benefit.
- If you are the individual applicant, check the box or write “Individual.”
- If you are authorized to sign for a business, nonprofit, or property owner, write your title and the entity’s legal name. Use the exact business name from its formation or registration records.
- If you are a parent or guardian signing for a minor, write that relationship in the space provided.
5) Select your status declaration.
- Read each status option carefully. Choose the one that matches your current status today. Typical options include U.S. citizen, lawful permanent resident, or lawfully present noncitizen in another qualifying category.
- Do not select more than one option. If more than one seems to apply, choose the most accurate current status. If you are unsure, pause and review your documents.
- If you select U.S. citizen, you will usually only attach your ID copy.
- If you select a noncitizen option, you must list the requested identifier from your document. Enter it exactly as shown, including any letters.
6) Provide the noncitizen identifier, if applicable.
- Find your alien registration number, admission number, or other identifier on your document. It may be labeled or appear near your name or photo.
- Enter the number with the correct format. Do not guess. If a number is missing, check a different document type you hold or contact your case manager for guidance on which number is required.
- Attach a legible copy of the document that shows this number. Front and back, if applicable.
7) Attach your secure and verifiable ID.
- Make a clear, full‑size copy of your government‑issued ID. Ensure your name, photo, and ID number are visible.
- Do not submit a blurry photo. Use a scanner or a high‑quality photo in good light.
- If your address on the ID is outdated, that is fine. The affidavit’s address field should reflect your current address.
8) Review the perjury and verification statements.
- Read the oath carefully. You are confirming the truth of your statements under penalty of perjury.
- Make sure every field is complete. If a question does not apply, write “N/A” rather than leaving it blank.
- Confirm that names and numbers match your documents.
9) Sign in front of a notary.
- Do not sign the affidavit until a notary instructs you to sign. A notarized signature is required.
- Bring your ID to the notary. The notary will verify your identity and watch you sign.
- The notary will complete their section. This includes the date, county, your name as signer, and the notary’s commission details. A seal or stamp is required.
10) Initial any corrections.
- If you make a mistake, draw a single line through it. Write the correct information nearby. Initial and date the change. The notary may need to re‑acknowledge significant changes.
- Avoid whiteout or heavy cross‑outs. If the form becomes messy, start over with a clean form.
11) Prepare any additional schedules or attachments.
- If the form instructs you to attach extra pages for explanations, label each page with your name and the date. Reference the specific section you are explaining.
- If multiple adults in your household need affidavits, prepare a separate package for each adult. Do not combine documents.
- If you are signing for an entity, include any required authorization letter or resolution, if requested by the program.
12) Make copies for your records.
- Keep a copy of the signed, notarized affidavit and all attachments.
- Save a digital copy as a PDF if you are submitting online. Name the file clearly.
13) Submit the affidavit as instructed.
- If you apply online, follow the upload instructions. Confirm the file uploaded fully and is readable.
- If you apply by mail, use a trackable method. Do not send originals of your ID unless the agency requests it.
- If you submit in person, bring copies and your originals for verification if requested.
14) Respond to follow‑up requests quickly.
- If the agency cannot verify your information, staff will contact you. They may ask for a clearer copy or a different document.
- Reply by the stated deadline. Delays in response can pause or deny your application.
15) Update the affidavit if your status changes.
- If you legally change your name, notify the agency and provide updated ID. You may need to sign a new affidavit.
- If your lawful presence status changes, contact your case manager. You may need to update your certification before funds disburse.
Practical tips can save time. Use black ink and print clearly if you complete the form by hand. Match your name across all documents. Check dates and numbers twice. Schedule your notary visit early, so you do not miss a submission deadline. Many banks, shipping stores, and law offices offer notary services. If remote notarization is allowed and available, ask your notary about the process and technology requirements. Bring everything to the appointment so you do not have to return.
If you are an entity applicant, prepare your signer properly. The signer must be an individual with actual authority, such as an officer or manager. Have the signer attest to their own lawful presence. The affidavit is about the person who signs for the entity, not about the entity’s status. Keep that in mind when you choose who will sign.
If you are unsure whether your program requires this affidavit, ask before you submit your application. Do not guess. A quick check with your case manager prevents delays.
Finally, remember the purpose. The affidavit is not a hurdle to trip you up. It is a compliance step the agency must complete. When you provide a clean, notarized affidavit with clear ID, you help the agency process your file without interruption.
5. Legal Terms You Might Encounter
Affidavit means a sworn written statement. On this form, you swear your eligibility is true under oath before a notary.
Public benefit means a program, grant, voucher, license, or service funded by the government. Your affidavit confirms you qualify before you receive it.
Lawful presence means you have a legal right to be in the United States. You choose the option that matches your current status.
U.S. citizen means you were born in the country or became naturalized. If true, you select the citizen option and show a valid ID.
Permanent resident means you hold a valid permanent resident card. You will enter your number and show acceptable identification.
Qualified alien means you have a specific protected immigration status. If you qualify, you will provide your status details and document numbers.
Nonimmigrant means you are in the country for a limited purpose and time. You will list your admission information and current status period.
Secure and verifiable document means an identification document the agency accepts. Examples include state-issued IDs and passports, when current and readable.
Notary public means a person authorized to verify identity and witness your signature. You must sign in the notary’s presence, not before.
Penalty of perjury means legal consequences for knowingly false statements. If you lie on the affidavit, the agency may deny benefits and take action.
Oath or affirmation means you declare your statements are true. You do this when the notary administers the oath before you sign.
Alien number means a unique number assigned to some noncitizens. If you have one, include it exactly as shown on your documents.
I-94 or admission number means the arrival record for many nonimmigrants. If you received one, enter the number and your status end date.
In-care-of representative means a person authorized to help you with the process. The form still needs your sworn statement and your signature.
Program administrator means the person or office handling your application. You submit the affidavit to that office, as it directs.
Record retention means keeping records for a required time. Keep a copy of your signed affidavit and ID image with your files.
6. FAQs
Do you need to get the affidavit notarized?
Yes. You must sign in front of a notary. Bring your identification and any status documents when you meet the notary. Do not sign ahead of time. The notary will confirm your identity, witness your signature, and complete the notary section. If your notary section is incomplete or missing, the agency will reject the affidavit. Some offices accept remote notarization. Confirm allowed methods before you proceed.
Do you have to include a copy of your ID?
Yes. You must present a secure and verifiable ID to the notary, and the agency often requires a copy. Make sure the copy is clear and includes both sides if relevant. Do not crop out expiration dates or photos. If the ID is expired, use a current ID. If you do not have a qualifying ID, speak with the program office about alternatives before filing.
Do you need to list your alien number or I-94 number?
Only if it applies to your status. If you are a citizen, you do not list these numbers. If you are a permanent resident, qualified alien, or nonimmigrant, include the requested details. Enter the numbers exactly as shown on your documents. Include any status end dates the form requests. Incorrect or missing numbers can delay your application.
Can a parent or guardian sign for a minor?
Yes, if the applicant is under the age of majority or lacks capacity. The parent or legal guardian may sign in front of a notary. The notary will verify the signer’s identity and authority. Bring proof of guardianship if you have it. The signer is swearing the statements are true on the applicant’s behalf. The program may request supporting records to confirm the relationship.
What if your immigration status is pending or you recently filed?
You still must choose the option that reflects your current lawful presence. If the form allows a pending category, use it. If not, select the most accurate current status and list your receipt or case number if requested. Attach any notices you have, if allowed. If your status changes later, submit an updated affidavit. Do not guess or choose a status you do not hold.
Do you need a Social Security number to complete the affidavit?
Not for the affidavit itself, unless the form requests it for verification. Some programs ask for it on the main application. If you do not have a number, leave it blank where allowed, or follow the form’s instructions. Never invent a number. Use your assigned immigration numbers where the form asks for them.
Can you use a foreign passport as your ID?
Often yes, if it is current and readable. A foreign passport is a secure and verifiable document when valid. If the form also asks for your admission record, include your admission details. If you use another ID, make sure it meets the “secure and verifiable” standard. Ask the program office if you are uncertain.
What happens if you choose the wrong category?
The agency may deny or delay your application. You may need to file a corrected affidavit. If you signed the wrong category by mistake, complete a new affidavit with the correct choice and have it notarized. Submit it promptly to your program administrator. Do not alter or overwrite the notarized original. Keep copies of both for your records.
7. Checklist: Before, During, and After the Affidavit
Before signing
- Confirm the exact program name and application number, if any.
- Verify which eligibility category fits your current status.
- Gather your secure and verifiable ID. Make sure it is current.
- For noncitizens, collect your alien number, I-94 or admission record, and status end date.
- Have any receipt or case numbers related to your status, if applicable.
- Prepare a clear copy of the front and back of your ID.
- If a parent or guardian will sign, bring proof of authority.
- Confirm whether remote notarization is allowed.
- Know where and how you must submit the completed affidavit.
- Check whether the program needs an original, a copy, or an upload.
During signing
- Print your full legal name exactly as it appears on your ID.
- Use your current residential address and contact information.
- Select only one category that matches your status today.
- Enter all requested numbers carefully, with correct formatting.
- Write dates in the required format and include status end dates if asked.
- Sign only in the notary’s presence. Do not pre-sign.
- Show your ID to the notary. Let the notary compare your name and photo.
- Make sure the notary completes every field, including seal, date, and commission details.
- Ask the notary to avoid cross-outs. If unavoidable, initial any corrections.
- Review the entire form for legibility and completeness before leaving.
After signing
- Attach the required ID copy, unless instructed not to.
- Submit the affidavit with your application to the correct office.
- If mailing, use a trackable method and note the date sent.
- If uploading, confirm the file is clear and the upload succeeded.
- Keep a complete copy of the signed and notarized affidavit.
- Record when and where you submitted it, and to whom.
- Calendar any follow-up deadlines the program sets.
- Respond promptly to any request for additional verification.
- If your status changes, complete and submit an updated affidavit.
- Store your copy securely for future renewals or audits.
8. Common Mistakes to Avoid
Choosing the wrong eligibility category. Do not guess. Pick the category that matches your current status. If you choose wrong, your application may be denied. You may also face delays while you file a corrected affidavit.
Signing before meeting the notary. Do not sign early. The notary must witness the signature. If you pre-sign, the affidavit is invalid. You will need to redo it, which can delay benefits.
Using expired or unclear identification. Do not present an expired ID or a blurry copy. The agency may reject your filing. Use a current, readable ID and provide clear copies.
Leaving number fields blank or incorrect. Do not skip your alien number, I-94, or end date if required. Missing or incorrect numbers can trigger verification holds. Double-check every digit.
Forgetting the notary seal or commission details. Do not leave the notary section incomplete. Missing seal, date, or commission expiration makes the affidavit invalid. Check the notary’s section before you leave.
Submitting to the wrong office or format. Do not guess where to send it. If you send it to the wrong place or upload the wrong file type, your application can stall. Confirm submission instructions first.
9. What to Do After Filling Out the Form
Complete notarization first. Your signature must be witnessed and the notary section fully filled. Confirm the seal, date, and commission details are visible.
Attach required identification. Include a clear copy of your secure and verifiable ID. If the program requests both sides, include both. If it requests additional status proof, add it.
Submit the affidavit with your program application. Follow the program’s instructions for in-person, mail, or online submission. Use the exact application or case number, if you have one. If submitting online, upload a high-quality scan or photo.
Confirm receipt. If you hand-deliver, ask for a date-stamped copy. If you mail, use tracking and save the receipt. If you upload, capture the confirmation screen or email.
Monitor status and respond. Watch for messages from your program administrator. Answer requests for clarification promptly. Provide any extra documents they ask for, such as clearer ID images or corrected numbers.
Handle corrections with a new affidavit. Do not modify a notarized affidavit. If you made a mistake or your status changed, complete a new affidavit. Get it notarized and submit it with a short cover note explaining the correction.
Keep records. Store a copy of the signed affidavit, your ID copy, and your submission proof. Keep notes on dates, who you contacted, and any case numbers. These records help with renewals and audits.
Update when your status changes. If you move from one category to another, file an updated affidavit. Submit it as soon as practical to keep your file accurate.
Coordinate with your application timeline. Some programs will not process benefits until they receive a valid affidavit. File early in your application process. Do not wait until the final step.
Ask procedural questions early. If anything is unclear, contact your program administrator. Confirm acceptable IDs, submission methods, and deadlines. Getting clarity up front prevents rework later.
Disclaimer: This guide is provided for informational purposes only and is not intended as legal advice. You should consult a legal professional.