CBP Form 214 – Application for Foreign-Trade Zone Admission and/or Status Designation
Fill out nowJurisdiction: Country: USA | Province or State: Federal
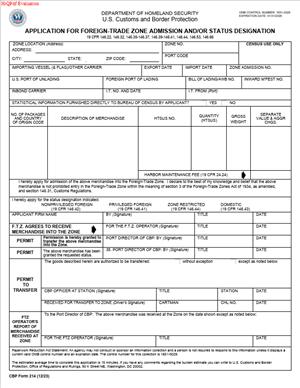
What is a CBP Form 214 – Application for Foreign-Trade Zone Admission and/or Status Designation?
This form is the official request to admit merchandise into a Foreign-Trade Zone (FTZ). It tells Customs which goods you are bringing into the zone and what status you want for them. You use it to defer duty, set tariff treatment, and start zone inventory control. It applies whether the goods are foreign, domestic, or moving from another zone.
You complete the form for each admission. It lists shipment details, values, quantities, and identifying marks. It also shows the zone site, operator, and applicant. You pick the status for each item line: Privileged Foreign (PF), Non-Privileged Foreign (NPF), Domestic (D), or Zone-Restricted (ZR). That choice controls how and when duty applies later.
Who typically uses this form?
Zone users and tenants who bring goods into a zone. Zone operators who manage the site and inventory. Importers who want duty deferral or other FTZ benefits. Customs brokers filing on behalf of zone users. Freight forwarders who handle the logistics and documentation. If you are a manufacturer, assembler, repairer, or distributor operating in a zone, you will use this form.
Why would you need it?
Because you cannot receive goods into an FTZ without a formal admission. The form is your admission request and legal declaration. It enables you to hold or process goods in the zone without paying duty upon arrival. It also fixes the status that drives future duty. For example, PF locks the tariff rate and value now. NPF lets the duty be based on the finished product later. ZR limits goods to export, destruction, or other restricted outcomes. Domestic status covers duty-paid or U.S. goods entering the zone.
Typical scenarios include a manufacturer bringing foreign components into the zone for assembly. A distributor receiving large volumes for storage and kitting. An e‑commerce hub consolidating imports for later allocation. A pharma company holding imported ingredients for testing. An energy facility operating a subzone for refinery inputs. In each case, you file a Form 214 to admit the shipment and assign the right status.
When Would You Use a CBP Form 214 – Application for Foreign-Trade Zone Admission and/or Status Designation?
You use the form whenever merchandise enters the physical limits of an FTZ. That includes arrivals from abroad, transfers from bonded warehouses, and moves from one FTZ to another. You also use it for U.S. goods you bring into the zone for storage or processing. The form applies at the time of admission, not when you later enter goods for consumption.
A common situation is direct delivery to your zone from the port. The vessel discharges, and the carrier moves the containers in-bond to the zone. You coordinate with the operator and file a Form 214 for the admission. The admission can be paper or electronic, depending on your process. Customs may approve it before or at the time of arrival. If you use direct delivery, you follow the timing rules for prompt filing.
Zone-to-zone transfers also require a Form 214 at the receiving zone. Your inventory leaves one zone under bond and is admitted into the next zone under a new 214. You identify the in-bond document, the sending zone, and the merchandise details. This maintains control and continuity of status.
Many importers file a 214 for weekly admissions. You may receive daily arrivals, each with its own admission. You then use a weekly entry for consumption when removing goods from commerce. The 214 is still required for each admission. It starts the zone record for those goods.
Domestic goods can be admitted with a 214 as well. If you move duty-paid products or U.S. origin materials into your zone, you use the form to record the admission and declare domestic status. This keeps your inventory system whole and allows you to commingle domestic and foreign goods under zone control.
Users include zone tenants and operators. Importers who are the consignee on the bill of lading. Customs brokers acting for the importer. Carriers and forwarders who hold in-bond control data. The operator must concur on the admission, so coordination is key. If you are the applicant, you ensure the operator signs and the data matches your inventory system.
You do not use a Form 214 to remove goods from the zone to U.S. commerce. For that, you make an entry for consumption and pay duties as required. The Form 214 is only for admission into the zone. It lays the groundwork for downstream entries.
Legal Characteristics of the CBP Form 214 – Application for Foreign-Trade Zone Admission and/or Status Designation
The Form 214 is a legal declaration and application. When you sign it, you certify that the information is true and complete. You also accept that the status you request binds the merchandise. Customs reviews and may approve, condition, or reject the admission. Once approved, the goods are in the zone under government control and the operator’s bond and procedures.
It is legally binding because it affects duty liability and tariff treatment. If you choose PF, you lock the classification and value at admission. That selection fixes how duty will be calculated if you later enter the goods for consumption. If you choose NPF, the duty will be based on the condition of the goods at the time of entry for consumption. If you assign ZR status, you cannot later enter the goods into the U.S. market. They must be exported, destroyed, or otherwise handled within the restrictions. Domestic status indicates that the goods carry no additional duty burden due to admission.
Enforceability rests on your bond, the operator’s bond, and your zone inventory control system. You must keep accurate records that tie each admission line to receipts, movements, transformations, withdrawals, and dispositions. Customs may examine the goods, verify quantities, review values, and audit your records. False statements or material omissions can lead to penalties, seizure, or loss of zone privileges. Customs can demand corrections, require additional information, or suspend admissions if your controls fail.
The signatures are important. The applicant certifies to the facts and requests admission. The operator concurs, acknowledging receipt and control under the zone procedures. Customs approves, signaling that the goods may be treated as in the zone. Until approval, you should not manipulate or mix the goods. Some direct delivery programs allow expedited handling, but you must still meet the admission and timing conditions.
You must maintain the admission documents and related records for the required retention period. Your inventory totals must reconcile to your admissions and withdrawals. If you change the status of goods after admission, you must use the proper process and keep the chain of documentation. Customs may rely on your 214 data to validate later entries, drawback claims, and export reports.
How to Fill Out a CBP Form 214 – Application for Foreign-Trade Zone Admission and/or Status Designation
Follow these steps to complete the form accurately and avoid delays.
1) Confirm your role and setup.
Decide who will be the applicant. It is often the zone user or importer. Confirm that the operator authorizes you to admit goods at the site. Ensure your bond and the operator’s bond cover the activity. Align on who files the form and who keeps records.
2) Gather required documents.
Collect the commercial invoice, packing list, and transport documents. You will need the bill of lading or air waybill number. Capture any in-bond number if the goods are moving under bond. Get container and seal numbers, and marks and numbers. Have the country of origin for each item. Assemble values for each line item and the relevant unit of measure. If you will request PF, confirm the HTS classification and whether any special program would apply if entered now.
3) Identify the zone and site.
Enter the FTZ number and the site or subzone identifier. Provide the physical address of the zone site where the goods will be received. Make sure this matches the operator’s records and your inventory control system. If the zone uses a site code or location code, include it.
4) Enter applicant details.
Provide your full legal name and mailing address. Include your IRS number or EIN. Add a phone and email for the admission contact. If a broker files for you, include the broker’s filer code and reference number. The applicant must be able to support the data and respond to inquiries.
5) Enter operator details and concurrence.
Insert the zone operator’s name and address. Identify the operator contact who will concur. Confirm that the operator will sign the form or provide electronic concurrence. Without operator concurrence, Customs will not approve the admission.
6) Provide port of entry and reference numbers.
List the port of entry and any internal port code used for your filings. Assign an admission number if your system requires a pre-number. Some operators assign a sequential FTZ admission number and share it with the applicant.
7) Add conveyance and transport data.
State the arriving carrier and voyage or flight number if known. Enter the bill of lading or air waybill number. If the goods move in-bond, provide the in-bond number and type. Include the container or trailer numbers and seal numbers. If loose cargo, list the marks and numbers on the packages. Provide the expected arrival date at the zone.
8) Describe the merchandise by line item.
Create a line for each distinct item. Use a separate line if the origin, status designation, unit of measure, or classification differs. Enter a clear description that matches the commercial invoice. Include the manufacturer identification code if known. Provide the country of origin for each line. If you request PF, include the HTS number and the rate basis you expect. If you request NPF, classification at admission is not binding, but accurate descriptions help later entries.
9) Record quantities, units, and weights.
Enter the quantity for each line using the correct unit of measure. Use the same unit you will use for withdrawals if possible. Add net weight and, if required, gross weight. Make sure the totals reconcile with the packing list and transport data. If you receive partial quantities, reflect the portion being admitted.
10) Enter values.
Report the dutiable value for foreign merchandise. Use U.S. dollars. If your invoice is in a foreign currency, convert using an appropriate rate and keep the support. For domestic status goods, show the value you assign for inventory control. If assists or other adjustments exist, reflect them if they affect the admission value for PF. Ensure the sum of line values equals the header value.
11) Choose the status designation per line.
Pick one of four statuses for each line:
- Privileged Foreign (PF): Locks classification and value at admission. Use when the tariff on inputs is lower than the finished good, or when you want certainty now.
- Non-Privileged Foreign (NPF): Defers duty until you enter the goods for consumption. Duty is based on the condition at that time. Use when the finished product has a lower rate than the inputs, or when you will scrap losses without duty.
- Domestic (D): For U.S. goods or duty-paid goods. No duty accrues from zone admission.
- Zone-Restricted (ZR): For goods that will not be entered for consumption. Use when you plan to export or destroy. This status cannot be changed to allow consumption later.
Document the rationale internally. Your choice affects future entries and any savings.
12) Summarize totals.
Provide total lines, total quantities, and total value. Break out totals by status if the form requires. If any quota or special program applies, note it in the remarks. Ensure the carrier data and totals match. Consistency avoids holds.
13) Provide bond and security information if requested.
Some ports ask for a bond reference. Coordinate with the operator to confirm which bond covers the admission. If a letter of authorization or power of attorney is needed for a broker, attach it.
14) Sign and date the application.
The applicant signs with their name and title. You are certifying that the data is true and complete. The operator concurs with a signature or electronic approval. Date both signatures. Keep a copy with your admission file.
15) Submit to Customs.
File the form per the port’s process. Many admissions are filed electronically through the designated platform. Some zones use paper only in special cases. Submit in time to meet direct delivery deadlines if you use that program. Track the admission status and note the approval.
16) Receive approval and admit the goods.
Wait for Customs approval unless your program allows conditional receipt. Once approved, receipt the goods in your inventory control system. Assign the admission number to each item or container. Update locations and lot identifiers. If Customs wants an exam, hold the goods intact until released.
17) Reconcile and retain records.
Reconcile the approved 214 to the actual receipt. Correct any variances with a supplemental filing if required. Keep all source documents and the completed 214. Retain records for the required period. Your inventory records must show the link from admission to each withdrawal or disposition.
18) Avoid common pitfalls.
Do not mix statuses on a single line. Do not request PF without solid classification and value support. Do not omit the in-bond number if the cargo is under bond. Do not mismatch container numbers or seals. Do not forget operator concurrence. Do not assume ZR can be changed later. If you plan weekly entries, align your admission units and measures to simplify withdrawals.
19) Use practical examples to guide choices.
If you assemble a product with a higher duty rate than the parts, request PF for the parts. That locks the lower rate at admission. If your finished product has a lower duty rate than the parts, request NPF. You will then pay duty on the lower rate at consumption entry. If you will export 100% of a batch, consider ZR to prevent accidental domestic entry. If you bring in U.S. spare parts to support repairs, use the Domestic status to keep your records clear.
20) Coordinate with your operator and broker.
Agree on how admission numbers are assigned. Align on units of measure and product codes. Share a data template to reduce errors. If you change a status strategy, document the reason and timing. Keep your compliance team in the loop.
When you complete these steps, your admission will be smooth and auditable. You will have clear records, a valid status for each line, and an approved admission that supports your FTZ operations.
Legal Terms You Might Encounter
Foreign-Trade Zone (FTZ) means a designated site under U.S. Customs supervision where you can admit merchandise without immediate duty payment. On this form, you identify the FTZ site where goods will be admitted and tracked.
Admission is the process of bringing merchandise into an FTZ. CBP Form 214 is the actual admission request. When accepted, you can move the goods into the zone and place them in the status you select.
Status designation tells Customs how to treat your goods for duty and trade purposes while in the zone and at removal. You choose the status on the form, and it affects duty, quota, and potential restrictions.
Privileged Foreign (PF) status fixes the tariff classification and duty rate as of the admission date. You elect PF on the form when you want to lock in the rate now rather than at withdrawal. This is common when you expect the rate to rise or you will manufacture and want certainty.
Non-Privileged Foreign (NPF) status leaves classification open until the goods leave the zone. You choose NPF on the form if you want to apply the classification of the finished product at withdrawal. This can reduce duty if finished goods carry a lower rate.
Domestic status covers goods produced or previously duty paid in the U.S. You can admit domestic status merchandise on the form, often to store it or to mix with foreign status goods. No additional duty applies when you later remove domestic status goods.
Zone-Restricted (ZR) status applies to goods that are limited to export, destruction, or transfer to another zone. You request ZR on the form when goods may not enter U.S. commerce. Once in ZR, you generally cannot re-designate to another status for domestic entry.
In-bond movement is the transport of imported goods under Customs control between ports or to an FTZ without paying duty. On the form, you reference in-bond numbers (if applicable) so Customs can link your admission to the prior control documents.
HTSUS classification is the tariff number you assign to your merchandise. You include it for each line item on the form. Classification accuracy drives duty treatment and status decisions.
FIRMS code is the facility code that identifies where the goods are located under Customs control. You may include the FIRMS code of the FTZ or arrival facility so Customs can route inspections and releases.
Grantee and operator are FTZ roles that matter for signatures and control. The grantee holds the zone grant. The operator runs the zone site, maintains the inventory system, and usually signs the form acknowledging receipt.
Port director is the local Customs official who authorizes admission. You file the form to the port that has jurisdiction over the zone. The port director’s acceptance is what allows transfer into the FTZ.
Inventory Control and Recordkeeping System (ICRS) is the operator’s system for tracking all admissions, movements, and removals. Your admission data from this form must flow into the ICRS and match your inventory at all times.
FAQs
Do you need to file CBP Form 214 before the goods arrive?
Often, yes. If you use standard admission, file and obtain approval before moving goods into the zone. If you use direct delivery authority, you may move goods to the zone first and then file the form within the permitted timeframe. Confirm your procedure with the zone operator so you do not miss a filing deadline.
Do you choose Privileged Foreign or Non-Privileged Foreign status?
It depends on your plan. Choose PF if you want to lock in the current classification and duty rate on admission. Choose NPF if you expect to make or assemble something and want to classify the finished product at withdrawal. PF can protect you against rate increases, but it removes the chance to apply a lower rate later. NPF gives flexibility but can increase duty if the final classification carries a higher rate.
Do you need a separate CBP Form 214 for each shipment?
Usually, yes. You file one admission per bill of lading or in-bond movement, broken out by line item. You can include multiple items on one form if they arrive together and share the same conveyance details. If arrivals are split or rerouted, expect to file separate admissions.
Do you need to include the commercial value on the form?
Yes. Declare the value for each line item based on your invoice and import valuation rules. Even though duties are deferred, Customs still needs accurate value to assess security, trade program eligibility, and later duty calculation when goods leave the zone.
Do you need to attach documents to the form?
Yes. Include the commercial invoice, packing list, bill of lading or airway bill, and any in-bond or manifest documents. If you are claiming a specific status or program that requires proof, include that support too. The operator may have a standard package checklist—follow it.
Can you change the status after admission?
You can change from NPF to PF before manufacture or manipulation begins, subject to approval. You generally cannot change from PF to NPF after admission. Zone-restricted status is typically final for domestic entry. File a request referencing the original admission if a change is allowed, and make sure your inventory records reflect the update.
Do you need a bond to admit goods to an FTZ?
Yes. The operator maintains a bond that covers zone activities, and in-bond carriers may have transport bonds. The importer may also have a bond for later entries. Make sure bond coverage is in place before you file. The bond information ties to the form and the movement.
How do you correct an error on a submitted CBP Form 214?
File an amendment. Identify the original admission number and the lines you need to correct. Provide the corrected data and supporting documents. Keep an audit trail in your inventory system so your records match Customs records at all times.
How long do you keep records for an FTZ admission?
Keep the form, approvals, and all supporting documents for at least five years from the date of removal from the zone or from the date of admission if removal does not occur. Your operator’s ICRS must retain traceability for the same period.
Checklist: Before, During, and After
Before signing
- Confirm the FTZ site and subzone number where the goods will be admitted.
- Get the operator’s written instructions and cut-off times for admission filings.
- Gather core documents: commercial invoice, packing list, bill of lading/air waybill, in-bond documents, arrival notices, and any inspection holds.
- Verify the importer of record number and tax ID.
- Confirm the port code and FIRMS code for the arrival and the FTZ.
- Classify each item under the correct HTSUS number with the unit of quantity for that tariff line.
- Determine the status designation for each line (PF, NPF, Domestic, or ZR) and document your rationale.
- Validate customs value for each line. Note assists, royalties, and other additions if they apply.
- Confirm the country of origin for each line and whether any trade remedies or quotas may apply later.
- Check bond coverage with the operator and carrier. Confirm who will file and sign the form.
- Create internal shipment control numbers that tie to the bill of lading, container numbers, and seal numbers.
During signing
- Verify the port of admission, FTZ site, and operator information on the header.
- Match the bill of lading or in-bond numbers to your shipping documents exactly.
- Enter container, trailer, and seal numbers without transposition errors.
- Confirm HTSUS numbers, descriptions, and the correct tariff units of measure.
- Check quantities and weights against the packing list and manifest. Pay attention to tariff units versus commercial units.
- Enter the correct value per line and total value. Confirm currency conversion if needed.
- Select the status designation per line. Make sure the status aligns with your processing plan.
- Confirm the importer of record number, consignee, and the signatory’s authority.
- Validate dates: arrival date, filing date, and any direct delivery timelines.
- Review any attachments listed in the form. Ensure the packet is complete and legible.
- Sign and date the form. If electronic, ensure the digital signature and submission receipt are recorded properly.
After signing
- File the form through the required electronic system or as instructed by the port. Keep the submission receipt.
- Provide the operator with a copy and all attachments so the ICRS can book the admission.
- Monitor for Customs acceptance or queries. Respond quickly to holds, exams, or document requests.
- Upon acceptance, arrange transfer from the arrival facility to the FTZ if not already delivered.
- Log the admission number, lines, and status in your inventory controls. Tie them to the location within the zone.
- Segregate PF and NPF inventories if both exist. Label pallets or bins to prevent mixing.
- For direct delivery, confirm that filing deadlines were met after arrival and that the operator acknowledged receipt.
- If errors are found, submit an amendment and update your ICRS immediately.
- Retain all records in a central file. Cross-reference by admission number and shipment details.
- Set reminders for downstream actions: manufacturing records, removals, and later entry filings when goods leave the zone.
Common Mistakes to Avoid
Selecting the wrong status. Choosing PF when you planned to classify the finished good, or NPF when you needed to lock in a favorable rate, can raise your duty costs later. Don’t forget to align status with your production plan before you file.
Mismatch between quantities and tariff units. Your invoice may show pieces, but the tariff requires kilograms or square meters. If the units do not match, Customs can reject the admission or flag it for examination. Convert and verify units line by line.
Incorrect or vague HTSUS classification. Broad or wrong tariff numbers lead to delays and potential penalty exposure. Use complete HTS numbers and clear descriptions. Confirm classification before you file, not after you receive a hold.
Typos in shipment identifiers. A single digit off in a bill of lading, in-bond, container, or seal number can break the chain of custody. Customs may not be able to match your admission to the arrival. Double-check all IDs against documents.
Missing or late filing under direct delivery. If you move cargo to the zone first, you must meet strict filing timelines. Late filings can trigger compliance issues and jeopardize your direct delivery authority. Track due dates and file promptly.
Inconsistent value support. Declared values that do not match your invoice or that ignore additions like assists can cause questions later at withdrawal. Build a valuation memo for each admission and save it with your records.
What to Do After Filling Out the Form
Submit the form as required. If you file electronically, capture the transmission number and timestamp. If you submit a paper packet, confirm delivery to the port and get a receipt. Either way, keep proof of submission in your records.
Coordinate with the operator. Share the completed form and attachments so the operator can post the admission in the inventory system. Ask for a written acknowledgment and the internal receiving record that confirms quantities, lot numbers, and locations.
Watch for Customs responses. Admissions can clear quickly, but holds and exams happen. If you receive a message or notice, act fast. Provide requested documents, arrange inspections, and keep your operator informed to avoid storage issues.
Manage the transfer. Once Customs authorizes admission, move the goods to the FTZ if they are not already there. Record container and seal integrity on arrival. If a seal is broken or differs from the form, document it and notify the port as instructed.
Update inventory and labels. Assign internal lot or SKU numbers and link them to the admission and status. Label PF and NPF inventory clearly. If you consolidate or break down shipments inside the zone, maintain traceability back to each admission line.
Plan downstream entries. When you remove goods from the zone into U.S. commerce, you will file an entry and pay duties based on the status you chose. If you plan weekly summaries or multiple withdrawals, schedule your filings and keep your paperwork aligned with removals.
Handle amendments and cancellations. If you discover errors after acceptance, file an amendment that references the original admission number and lines. If cargo did not arrive or will not be admitted, request cancellation and close out any in-bond moves that are still open.
Maintain compliance records. Keep the admission, supporting documents, Customs acknowledgments, and internal receiving records together. Retain records for at least five years. Make sure your ICRS matches the admissions and that physical counts support your books.
Communicate changes. If the operator, importer, or consignee information changes, update future admissions and, where needed, amend prior ones. Keep contact lists current so time-sensitive notices reach the right people.
Review performance. After your first few admissions, hold a quick review with your team and the operator. Look for patterns in errors or delays. Adjust your checklist, templates, and training so the next admission runs smoother.
Disclaimer: This guide is provided for informational purposes only and is not intended as legal advice. You should consult a legal professional.