Form 6 – Statutory Declaration
Fill out nowJurisdiction: Country: Canada | Province or State: Prince Edward Island
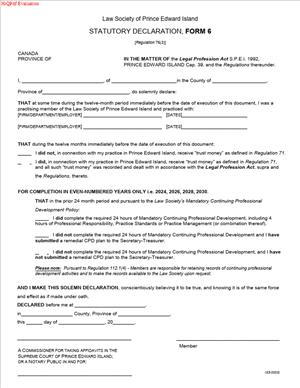
What is a Form 6 – Statutory Declaration?
Form 6 is a formal statement of facts you swear or affirm to be true. The Law Society of Prince Edward Island uses this form to verify information in its regulatory processes. It is not a contract. It is a sworn declaration that carries legal weight. You complete it when the Law Society needs evidence that only you can provide in writing.
You use Form 6 to confirm facts about your status, your history, or your compliance. It is common in licensing, membership changes, and practice regulation. You sign it in front of a person authorized to take declarations. That person is often a Commissioner of Oaths, a Notary Public, a Justice of the Peace, or a lawyer in Prince Edward Island.
Who typically uses this form?
Law students and articled clerks use it during the admission steps. Principals and employers use it to verify employment details or articles. Practising lawyers use it to support transfers, reinstatements, and changes in status. Firm administrators may use it when confirming firm-level facts. An executor or practice custodian may use it when dealing with a lawyer’s practice after death or incapacity.
Why would you need it?
The Law Society often needs proof from you, not a third party. Examples include proof of your identity details, your good character, or your compliance with rules. It may also confirm you have completed articles, closed a trust account, or met continuing competence rules. The form presents these facts in a formal way that the Law Society can rely on.
Typical usage scenarios
You apply to register as a student, and you must declare your education and disclosures. You complete articles and must verify your term, your principal, and your work. You apply for call to the bar and must declare your character and history. You transfer from another province and must confirm your standing and discipline history. You switch to non-practising status and must confirm no clients or trust funds remain. You reactivate your practice and must confirm your insurance and CPD position. You close your trust account and must confirm final reconciliations. You change your name and must confirm the legal change. In each case, Form 6 collects a clear, sworn record of the facts.
The form follows a consistent structure. It identifies you, sets out numbered statements, and includes a jurat. The jurat is the part that the commissioner completes that shows when and where you declared. Attachments called exhibits or schedules support your statements. You must sign in front of the commissioner. The commissioner signs and adds their title and details. The Law Society then uses the completed form to decide the next step in your file.
When Would You Use a Form 6 – Statutory Declaration?
You use this form when the Law Society asks for a sworn statement in a process. The need depends on what you are doing. If you are a student-at-law, you may use it to declare your education history or disclosures. You may also declare your article’s start or end date, and your principal’s name. If you have had a name change, you can declare that and attach the change certificate.
If you are an articled clerk nearing call, you likely use it to confirm completion of your term. You declare that you met the required period, coursework, and any assessments. You may also declare any issues that arose and how they were resolved. This is common when dates shift or your principal changes.
If you are a lawyer transferring to Prince Edward Island, you use it to declare facts about your status. You confirm your current membership elsewhere, your discipline and conduct history, and your practice experience. You may attach letters from other law societies as exhibits. Your declaration ties those exhibits to your application. The Law Society relies on your statement to assess your eligibility.
If you are a practising member, you may use Form 6 for administrative changes. You may declare a change from practising to non-practising status. You confirm you have notified clients, ended trust activities, and handled client property. You may declare a change to a sole practice or a firm, with details about supervision or insurance. If you reactivate, you declare you have met the education or insurance conditions.
If you manage a trust account, you may use Form 6 during opening or closing. You declare bank details, reconciliations, and final balances. You confirm that trust funds have been dealt with properly. You may attach trust reconciliations as exhibits. Your declaration helps the Law Society confirm you met trust requirements.
If you are an executor or custodian of a lawyer’s practice, you may use Form 6 to report. You declare you have secured files and client property. You confirm your steps to notify clients or transfer files. You attach inventories or correspondence as exhibits. Your declaration supports the Society’s oversight of the wind-down.
You may also use the form to correct or clarify a past filing. For example, you notice a discrepancy in your earlier dates. You can submit a declaration that corrects the record and explains the change. The Law Society can then update your file based on a sworn statement.
Finally, you may use it when you cannot obtain a separate certificate for a fact. For instance, a third party cannot provide a letter in time. The Society may accept your sworn declaration as an interim measure, pending the letter. You still carry full responsibility for the accuracy of your statements.
Legal Characteristics of the Form 6 – Statutory Declaration
A statutory declaration is a solemn statement of fact. It is not a promise about the future. It is not a contract between parties. It is a way to give formal evidence outside a court process. In regulatory work, it has high evidentiary value. The Law Society relies on it to make decisions. You sign it knowing that false statements have serious consequences.
Is it legally binding?
In the sense that you are bound by your statements, yes. Your declaration can be used as evidence against you. If it is false, you may face regulatory consequences and criminal liability. The same is true if you omit a material fact that makes a statement misleading. The seriousness aligns with a sworn affidavit. The law treats a false statutory declaration as a serious offence.
What ensures enforceability?
The formalities do. You must sign in front of a person authorized to take declarations. The commissioner confirms your identity and that you swore or affirmed. They sign the jurat, add the date, place, and their capacity. The declaration must be complete, legible, and free of uninitialed changes. Each exhibit must be identified and marked. These steps prove that the declaration was properly made.
Several legal considerations apply. First, the person taking your declaration must be authorized in the place of signing. In Prince Edward Island, many lawyers are also commissioners. Notaries and Justices of the Peace can also act. If you sign outside the province, use a local notary or other authorized officer. A seal may be required for out-of-province declarations. Second, you must understand the language. If you need an interpreter, arrange one. The interpreter may also sign a brief declaration. Third, you must choose to swear or affirm. If you prefer not to swear, you can affirm. Both are equally valid.
Timing matters. The Law Society may require a recent date. If a declaration is stale, you may need a new one. Do not backdate or pre-sign. Sign only on the day you appear before the commissioner. Bring a valid photo ID. The commissioner may refuse if they cannot verify your identity. If you sign by video, the commissioner must follow local rules. That includes identity checks and records. Confirm that remote commissioning is permitted before you proceed.
Accuracy is critical. Review other materials in your file for consistency. Your declaration should not conflict with letters on record. If it does, explain why. Attach documents that support your statements. Label them properly. Your declaration should tell a coherent story that the exhibits confirm.
Retention and privacy also play a role. The Law Society keeps your declaration in your regulatory file. It may share it as needed for its statutory duties. Avoid including unnecessary personal data. Include only what the matter requires. If you must include sensitive information, consider a separate confidential schedule. Ask if a sealed filing is appropriate before you submit one.
Finally, be mindful of alterations. Do not use white-out. If you make a mistake, draw a single line through it. Write the correction neatly. Initiate the change. Ask the commissioner to initial it as well. Large changes may require redoing the page. The safest approach is to prepare a clean copy before you sign.
How to Fill Out a Form 6 – Statutory Declaration
Follow these steps to complete the form properly.
Step 1: Confirm you have the current version.
Check that the title reads “Form 6 – Statutory Declaration.” Confirm that the layout matches the latest instructions. If the Law Society sent you a copy, use that copy. Do not modify the structure.
Step 2: Gather key information.
Collect your full legal name, residential address, and contact details. If you are a member, have your membership number. Gather dates, names, and facts you need to declare. Pull supporting documents. Examples include transcripts, letters, reconciliations, or certificates. Prepare clean copies for exhibits.
Step 3: Identify the declarant.
At the top, enter your full name exactly as it appears on your government ID. Include any former names if relevant. Enter your city or town and the province or state. State your occupation or capacity. Examples include “student-at-law,” “barrister and solicitor,” “firm administrator,” or “executor of the estate of [name].”
Step 4: Set the context of the declaration.
In the opening lines, state why you are making the declaration. Example: “This declaration supports my application for call to the bar.” Or “This declaration confirms the closure of my firm’s trust account.” Keep the purpose sentence short and precise.
Step 5: Draft numbered statements of fact.
Use short, clear sentences. One fact per paragraph. Arrange the facts in order. Start with identity and capacity. Then address the specific requirements. For example:
- “I began articles with [Principal’s full name] on [date].”
- “I completed [number] months of articles on [date].”
- “I attach my principal’s confirmation as Exhibit A.”
- “I have disclosed all charges or convictions to the Law Society.”
Tailor the content to your matter. Avoid vague language. Use exact dates, names, and amounts.
Step 6: Refer to exhibits clearly.
If you attach documents, label each one. Use “Exhibit A,” “Exhibit B,” and so on. On the first page of each exhibit, add a label that matches your reference. The label should include your name, the exhibit letter, and the date. The commissioner should sign or initial the exhibit label when you sign the declaration.
Step 7: Include authority if you sign for someone else.
If you declare on behalf of a firm, state your title and authority. If you declare for an estate, state your role, such as executor or administrator. Attach proof of authority as an exhibit. For example, attach your appointment documents as Exhibit A.
Step 8: Add any required confirmations or acknowledgments.
Some processes require specific confirmations. Examples include “I have no outstanding trust balances” or “I have completed the required bar admission courses.” Include them as separate numbered statements. If the process asks for precise wording, use that wording.
Step 9: Complete the location and date in the jurat.
Leave the signature lines blank for now. Enter the city or town where you will sign. Enter “Province of Prince Edward Island” if you will sign in PEI. If you will sign elsewhere, enter that jurisdiction. Do not guess. Confirm the location with the commissioner you will visit.
Step 10: Meet with the commissioner.
Bring government-issued photo ID. Bring the unsigned declaration and all exhibits. The commissioner will verify your identity. They will ask whether you wish to swear or affirm. If you swear, you may hold a holy book if you choose. If you affirm, you make a solemn affirmation. Both are valid. Do not sign until instructed.
Step 11: Sign in the commissioner’s presence.
Sign your usual signature in ink. The commissioner completes the jurat. They add the date and place. They print their name, title, and, if applicable, commission expiry. They add their stamp or seal if they have one. If you are outside PEI, a notary will usually apply a seal.
Step 12: Initial any corrections.
If a small correction was needed, ensure you and the commissioner initial it. If the change is large, consider reprinting and resigning the page. Avoid messy alterations. Clarity helps the Law Society process your form faster.
Step 13: Assemble the package.
Put the declaration on top. Place exhibits behind in the order cited. Use tabs or clear labels for each exhibit. Number the pages at the bottom right if the form allows it. Secure the pages with a staple or binder clip. Do not obscure signatures or seals.
Step 14: Make a copy for your records.
Keep a clear scanned PDF and a paper copy if possible. Name the file with the date and subject. Example: “2025-03-10 Form 6 – Trust Account Closure.pdf.” Good records make future updates easier.
Step 15: Submit as instructed.
If the Law Society has asked for a physical original, provide it. If electronic submission is permitted, scan in color at high resolution. Ensure the commissioner’s stamp and any seals are legible. Confirm receipt if required.
Step 16: Be prepared to answer follow-up questions.
The Law Society may request clarification or more documents. Respond promptly. If you discover an error after submission, notify the Society at once. You may need to file a new declaration to correct the record.
Step 17: Avoid common mistakes.
Do not sign before meeting the commissioner. Do not leave blanks. Do not use outdated names or incomplete dates. Do not attach exhibits that are missing pages. Do not rely on acronyms the Society may not recognize. Spell out names and terms at first use.
Step 18: Consider privacy and sensitivity.
Redact personal identifiers in exhibits unless they are essential. For example, mask account numbers except for the last four digits unless full numbers are required. If an exhibit contains third-party personal data, note your reason for including it.
Step 19: Use a schedule when you need more space.
If your facts exceed the space provided, add a Schedule A. Title it clearly and reference it in your numbered statements. For example: “The client list appears at Schedule A.” Sign or initial the bottom of each schedule page.
Step 20: Confirm alignment with your broader file.
Check that your statements match your application forms, letters, and certificates. Resolve any conflicts in the declaration text. A short, clear explanation prevents delays. If you rely on prior filings, refer to them by date and title.
If you follow these steps, you will produce a complete and reliable Form 6. Your declaration will be clear, consistent, and properly commissioned. That helps the Law Society process your matter without delay. It also protects you, because your statements are accurate and well supported.
Legal Terms You Might Encounter
- You will see the word “declarant.” That means you. You are the person making the statement in Form 6. You declare that the facts are true to the best of your knowledge and belief.
- A “statutory declaration” is a formal written statement. You sign it under oath or affirmation before an authorized official. This form is a statutory declaration. You use it when a rule or process requires a sworn statement instead of an affidavit.
- An “oath” is a promise to tell the truth that calls on a higher power. An “affirmation” is a secular promise to tell the truth. Both have the same legal effect. In Form 6, you choose one. The official records, which one did you use?
- A “commissioner for oaths” or an “authorized official” is the person who takes your declaration. A “notary public” can also perform this role. They confirm your identity, ensure you understand the declaration, and witness your signature. Their name, title, and expiry (if any) must appear in the form.
- The “jurat” is the block of text at the end of the declaration. It confirms the place, date, and that you declared before the official. It includes the official’s signature and details. If the jurat is incomplete, the form may be rejected.
- An “exhibit” or “annexure” is a document you attach to support your declaration. Think of bank statements, emails, or letters. Each exhibit must be clearly labeled and referenced in the body of your declaration. The official will mark or initial each exhibit.
- “Personal knowledge” means facts you know directly. “Information and belief” means you rely on information from another source that you believe to be true. In Form 6, be clear which applies. Use “to the best of my knowledge and belief” when you rely on both.
- “Capacity” refers to the role in which you make the declaration. You may sign in your personal capacity or on behalf of a firm or organization. In Form 6, state your capacity if you sign for someone else. Ensure you have the authority to do so.
- “Correction protocol” means how you handle errors. If you make a mistake on Form 6, do not use correction fluid. Strike out the error with a single line, write the correction, and initial it. The official should also initial the change.
- A “false declaration” is an untrue statement made knowingly or recklessly. It can lead to serious consequences. That can include application refusal, disciplinary action in a professional process, and potential penalties under the law. Take the time to review before you sign.
FAQs
Do you need to sign Form 6 in front of an official?
Yes. You must sign in the presence of an authorized official. Do not sign in advance. The official must see you sign and must complete the jurat.
Do you need to show identification?
Yes. Bring government-issued photo ID. A driver’s licence or passport is typical. The name on your ID should match the name on Form 6. If it does not, bring proof of any name change.
Can you complete Form 6 remotely or electronically?
Some officials may offer remote commissioning. Rules vary and can change. Ask the official before you book. Confirm any technology or identity requirements in advance.
Do you need a witness in addition to the official?
No. The authorized official acts as the witness. Do not add a separate witness unless the instructions for your process explicitly require one.
Can someone else sign Form 6 on your behalf?
No. You must sign your own declaration. If you sign on behalf of an organization, you still sign personally and state your title. You must have the authority to bind the organization.
What happens if you make an honest mistake after signing?
Prepare a new Form 6. You cannot alter a signed statutory declaration. Crossed-out or altered jurats often get rejected. It is faster to redo the form correctly.
Do exhibits have to be labeled or stamped?
Yes. Label each exhibit clearly (for example, “Exhibit A”). The body of Form 6 should refer to that label. The official will mark or initial each exhibit and may add an exhibit note. Keep exhibit order consistent with your references.
Does Form 6 expire?
The declaration reflects facts as of the date you sign. Some processes require a recent declaration, such as within 30, 60, or 90 days. Check the instructions for your process. If there is a currency requirement, sign close to your filing date.
Do you need to pay a fee to sign Form 6?
Some officials charge a fee. Ask about the fee, accepted payment methods, and whether exhibits cost extra. Bring the exact payment to avoid delays.
Should you keep a copy of the signed form?
Yes. Keep a high-quality copy of the signed form and all exhibits. Store the original in a safe place. Note the date, the official’s name, and where you filed it for your records.
Checklist: Before, During, and After the Form 6 – Statutory Declaration
Before signing
- Read the entire Form 6. Confirm you understand each statement.
- Gather identification. Bring a valid government-issued photo ID.
- Confirm your legal name format. Match your ID exactly. Include middle names if required.
- Collect all exhibits. Number or letter them in order. Ensure each is complete and readable.
- Verify dates and facts. Confirm spellings, addresses, and timelines.
- Confirm your capacity. If you sign for an organization, bring proof of authority.
- Check currency requirements. If a recent date is needed, time your appointment accordingly.
- Book an authorized official. Confirm fees, payment method, and remote options if needed.
- Print the form single-sided if required. Some officials prefer no double-sided pages.
- Do not sign yet. You must sign in front of the official.
During signing
- Present your ID. Allow the official to examine it.
- Confirm your full name and address on the form. Fix any mismatches before signing.
- Review the declaration text aloud if asked. The official must ensure you understand.
- Choose oath or affirmation. The official will administer the one you choose.
- Sign with your usual signature. Use blue or black ink. Stay within the signature box if provided.
- Date the form correctly. The date must match the official’s date in the jurat.
- Ensure the jurat is complete. It must show the location, date, official’s name, title, and any expiry.
- Mark exhibits properly. The official should mark or initial each exhibit. Check the labels match your references.
- Initial any minor corrections. The official should also initial them. Avoid large edits; redo the page if needed.
- Ask for a quick final review. Make sure nothing is missing or illegible.
After signing
- Obtain a copy. Ask for a scanned PDF or make a clean photocopy of the signed set and all exhibits.
- Submit the form as instructed. Confirm where, how, and by when to file it.
- If filing by mail or courier, use a trackable method. Keep the tracking number.
- If filing electronically, follow file naming and size rules. Combine exhibits if asked.
- Note the filing date and recipient contact. Keep a record of delivery or confirmation.
- Store the original safely. Use a labeled folder and note the context and date.
- Calendar any follow-up dates. Include response deadlines and expiry windows, if any.
- If the form is rejected, ask why. Correct the issue and re-execute the form as needed.
Common Mistakes to Avoid Form 6 – Statutory Declaration
Signing before you meet the official
- Consequence: The declaration is invalid. You will have to redo it. Your timeline may slip.
- Don’t forget: You must sign in front of the official. Bring unsigned pages to the appointment.
Using exhibits that are unclear or unlabeled
- Consequence: The reviewer cannot verify your evidence. Your filing may be delayed or refused.
- Don’t forget: Label each exhibit. Reference the label in the form. Ensure all pages are legible.
Mismatched names, dates, or addresses
- Consequence: The form may be rejected. You may need to provide extra proof or a new declaration.
- Don’t forget: Check every instance of your name. Match your ID. Confirm dates and locations.
Incomplete jurat or missing official details
- Consequence: The declaration lacks proof that you signed correctly. It may not be accepted.
- Don’t forget: Verify the jurat shows the place, date, official’s name, title, and signature.
Using correction fluid or heavy edits
- Consequence: The form can be questioned or refused. You may need to re-sign.
- Don’t forget: For small errors, strike through once and initial. For larger errors, reprint and redo.
Assuming you can amend after signing
- Consequence: Post-signing changes void the integrity of the declaration.
- Don’t forget: If anything changes, complete a new Form 6 and sign it again with the official.
What to Do After Filling Out the Form 6 – Statutory Declaration
Submit the form as directed in your process
- Follow the instructions you received with Form 6. File by the stated method and deadline. If you must send originals, do not send copies. If electronic filing is allowed, use a clean, complete PDF.
The package exhibits correctly
- Combine exhibits in the order referenced. Include a table of contents if the set is large. Ensure the official’s exhibit markings are visible on every exhibit.
Confirm receipt
- If you deliver in person, ask for a receipt. If you send by mail or courier, track delivery. If you file electronically, save the submission confirmation. Record the date, time, and the person or office that received it.
Prepare for follow-up
- Keep your contact details current. Watch for follow-up questions. Respond quickly and in writing. If asked for clarification, provide a new declaration if the facts have changed.
Handle corrections the right way
- If you discover an error after filing, do not alter the filed document. Prepare a new Form 6 with the corrected information. Cross-reference the earlier filing if helpful.
Manage copies and retention
- Keep a clean copy of the signed form and all exhibits. Store them in a secure, organized folder. Note the context, date of signing, and where you filed the original. Follow any retention period specified in your process.
Inform impacted parties
- If Form 6 supports an application or registration, notify your internal stakeholders when you file. Share a copy, the filing date, and expected next steps. This avoids duplicate efforts and missed deadlines.
Plan for future updates
- Some processes require periodic updates. If your facts change, prepare a new declaration. Track renewal or currency requirements so you do not miss a cut-off.
Disclaimer: This guide is provided for informational purposes only and is not intended as legal advice. You should consult a legal professional.