OREA Form 401- Agreement to Lease – Residential
Fill out nowJurisdiction: Country: Canada | Province/State: Ontario
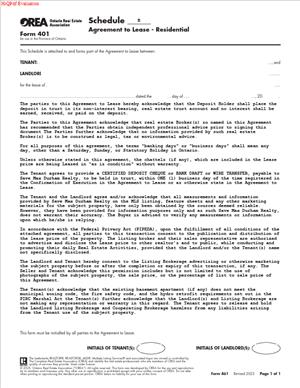
What is an OREA Form 401 – Schedule B – Agreement to Lease – Residential?
Schedule B is an attachment to the standard Agreement to Lease – Residential. It adds custom terms, conditions, and disclosures to the offer. It lets you tailor the deal to a specific property, building, or tenant situation. Think of it as the “extra pages” where you cover details that do not fit in the main form.
You use Schedule B when you want more precision. The main form sets the core business terms. Schedule B handles the rest. That often includes utilities, keys and fobs, condo rules, insurance, cleaning, deposits, move-in steps, and more. You can also add conditions for screening and documents.
Who uses this form?
Landlords, tenants, and their real estate representatives. Property managers also use it. It appears in most residential lease offers handled through brokerages in Ontario. You will see it for condos, houses, townhomes, and accessory units, like basement apartments.
Why would you need this form?
Because the main form is short. Many important points need more words. Schedule B helps you capture those points. It reduces disputes later. Clear clauses set expectations on day one. You avoid guesswork at move-in and move-out.
Typical usage scenarios
- A downtown condo with strict building rules. You attach the rules and require compliance. You also set elevator booking steps and moving deposits.
- A house where the tenant pays all utilities. You specify which accounts must be set up before key release. You require proof and timelines.
- A student rental with a guarantor. You add a guarantor clause and attach a separate signature page for the guarantor.
- A short fixed term for a corporate relocation. You define cleaning standards, furniture inventory, and insurance coverage.
- A pet-friendly unit in a condo with limits. You align the pet rules with the building rules and insurance needs.
Schedule B forms part of the offer once attached. It gets initialed with the rest of the offer. If the parties accept the offer, Schedule B becomes binding with it. You then carry its terms into the standard lease document that follows.
When Would You Use an OREA Form 401 – Schedule B – Agreement to Lease – Residential?
You use Schedule B any time the default terms are not enough. If you need extra clarity, you add it here. For example, you lease a condo with amenities and strict move–in rules. You include elevator booking rules, time slots, and fees. You also add a clause that the tenant will comply with all building rules. You attach those rules or reference delivery within a set time.
You also use Schedule B to capture deal logistics. A landlord may require tenant liability insurance. You can state the minimum coverage, the proof needed, and the timing before key release. You can also include who pays for utilities, what happens if meters are not set up, and how keys and fobs are handled.
If a guarantor is part of the offer, you use Schedule B. You add a guarantor clause and attach a signed guarantor schedule. This matters for student rentals and newcomers. The clause should make the guarantor jointly and severally liable. It should last for the full term and any lawful extension.
You also use it to address maintenance and cleaning. For example, you may promise a professional clean before possession. You then require the unit be returned in the same clean condition. You can address carpet cleaning if the unit had carpets at move–in. You can state that any cleaning charges must reflect actual, reasonable costs.
You use Schedule B for communication and notices. You can set email addresses for routine communications. You can set business hours for delivering non-statutory notices. You should not override delivery rules for statutory notices. Those follow prescribed forms and service rules.
You use it where there are special property items. That includes window coverings, light fixtures, furniture, and parking or locker spaces. You list what is included and its condition. You can mark items as “as-is” to avoid warranty disputes.
You also use it to line up the next steps after acceptance. You can require the parties to sign the provincial standard lease within a set time. You can require that Schedule B terms carry over into that document or remain as an addendum. This keeps the paperwork consistent across documents.
In short, Schedule B applies to almost every residential lease offer done through a brokerage. If the deal has any custom terms, you put them here.
Legal Characteristics of the OREA Form 401 – Schedule B – Agreement to Lease – Residential
Schedule B is part of a larger offer. Once attached and initialed, it forms part of the Agreement to Lease. When the offer is accepted, and any conditions are fulfilled or waived, the agreement becomes binding. Schedule B’s clauses bind the parties with the rest of the agreement.
Why is it legally binding?
Because it is integrated into a signed offer that meets contract rules. The agreement identifies the parties, the premises, the rent, and the term. It includes consideration and acceptance. Schedule B adds more terms but does not change that structure. Integration language on the schedule confirms that it forms part of the agreement.
What ensures enforceability?
Clear language, proper execution, and compliance with Ontario’s residential tenancy law. Use precise terms. Avoid contradictions with the main form. If a conflict exists, many schedules include a clause stating that the schedule prevails. This is common, but the law prevails over any document. A term that conflicts with mandatory law will not stand.
Some clauses are not enforceable if they conflict with the law. Examples include:
- A “no pets” clause is void in most residential tenancies. Building rules can still limit pets in some condominiums. You can require compliance with building rules.
- A damage deposit is not allowed. A last month’s rent deposit is allowed. A refundable key or fob deposit that reflects replacement cost is allowed.
- Mandatory post-dated cheques or pre-authorized debits are not allowed. A tenant can choose a permitted payment method.
- Clauses that reduce the landlord’s repair duties are not enforceable.
- Clauses that waive a tenant’s lawful rights are not enforceable.
To reduce risk, align Schedule B with the law. Keep pet language focused on building rules and nuisance. Make key and fob deposits refundable at replacement cost. State that the last month’s rent deposit will earn interest at the guideline rate. Avoid automatic, non-refundable fees. If you claim costs later, those should reflect actual losses.
Authority to sign also matters. If a corporation is the landlord or tenant, use the legal name. Include the signing officer’s title and authority. If an attorney or authorized agent signs, state the capacity and attach authority. Each page, including Schedule B, should be initialed. Electronic signatures are permitted.
Remember that the provincial standard lease is a separate document. After acceptance, a party can request a standard lease. Clauses from Schedule B should be copied into that document or attached to it. If a conflict arises between the standard lease and the agreement, the law and the accepted agreement guide the outcome. The safest path is to keep all documents aligned.
Finally, notice provisions require care. Routine notices can go by email if both parties agree. Formal notices under residential tenancy law follow prescribed service rules. You should not try to replace those rules in Schedule B. You can state that email is fine for day-to-day communications and for delivering deal documents.
How to Fill Out an OREA Form 401 – Schedule B – Agreement to Lease – Residential
Follow these steps to complete Schedule B with confidence.
1) Match the header to the main agreement.
- Enter the property address exactly as it appears on the main form.
- Enter the date of the offer. Keep it consistent across all pages.
- Identify the parties by their full legal names, matching the main form.
- Mark the schedule letter as “Schedule B.” If there are multiple pages, number them.
2) Plan your clauses before you type.
- List the topics you must cover: utilities, insurance, deposits, building rules, keys and fobs, cleaning, inclusions, parking, move-in steps, and any conditions.
- Group related terms under clear numbered clauses. Use subclauses for detail.
- Use short, direct sentences. Avoid vague language.
3) Address deposits and key items.
- Last Month’s Rent: Confirm the deposit collected on acceptance, if not already defined. State that interest is payable at the guideline rate.
- Keys/Fobs/Garage Remotes: List items to be given at possession. If you collect a refundable deposit, state the amount and that it equals replacement cost. State when the deposit is returned.
- Do not add any “damage deposit.” That is not allowed.
Sample wording idea:
- “Tenant will receive 2 keys and 2 fobs. Tenant will provide a refundable deposit of $100 for fobs. The deposit equals the replacement cost. Landlord will refund the deposit at key return.”
4) Clarify utilities and services.
- List who pays for hydro, gas, water, hot water tank rental, internet, and cable.
- If accounts must be set up, state which accounts, and by when.
- Add proof requirements if you need them before key release.
- If utilities remain in the landlord’s name, set a cost-sharing method or flat rate.
Example approach:
- “Tenant will set up hydro and gas accounts in Tenant’s name by two business days before possession. Tenant will provide proof of account numbers. Water is included in rent.”
5) Set insurance expectations.
- Require tenant liability insurance with a minimum limit. Many use $1,000,000 or $2,000,000.
- Ask for a certificate of insurance before key release, naming the premises address.
- State that coverage must remain in place for the term and any lawful extension.
6) Confirm inclusions, exclusions, and conditions.
- List appliances and any furniture included. Note the working condition, if known.
- If any item is “as-is,” say so.
- Promise a clean and vacant unit at possession. If you promise professional cleaning, state it. Avoid automatic cleaning fees on move-out. Instead, require a return in the same clean state, with less normal wear and tear.
Sample structure:
- “Appliances included: fridge, stove, dishwasher, washer, dryer, microwave. Window coverings and existing light fixtures included. The landlord will provide the premises professionally cleaned before possession. Tenant will return the premises in the same clean condition, less normal wear and tear.”
7) Add building or community rules if the unit is a condo or a managed community.
- State that the tenant will comply with the declaration, bylaws, and rules.
- Attach the rules or promise delivery by a set date. Allow a reasonable time to review.
- Address elevator bookings, move-in deposits, time windows, and any fees. Clarify who pays those fees and who handles bookings.
8) Set pet, smoking, and cannabis terms in a lawful way.
- You can prohibit smoking and vaping inside the premises and on balconies.
- For pets, avoid blanket bans. Tie compliance to building rules and nuisance. You can require that pets not disturb others or damage the premises.
- You can prohibit cannabis cultivation if building rules or insurance require it. State that the tenant must comply with those rules.
9) Define maintenance and repairs.
- Confirm the landlord’s duty to maintain major systems and comply with health and safety.
- Confirm the tenant’s duty to keep the unit clean and repair damage caused by the tenant or guests.
- State that the tenant will replace light bulbs and batteries where accessible.
- Clarify any seasonal duties if applicable, such as lawn care or snow removal for a private driveway. Be specific about the tools provided.
10) Describe entry, showings, and end-of-term access.
- Confirm that entry for repairs, inspections, and showings follows legal notice rules.
- You can set showing windows during the last 60 days of the term. Ask for reasonable cooperation. Keep the notice rules intact.
11) Assignments, sublets, and roommate changes.
- A tenant can request to assign or sublet, subject to legal rules. You can require written consent, not to be unreasonably withheld.
- For roommate changes in shared units, set a simple notice process. Keep it consistent with the law.
12) Parking and locker details.
- Identify parking space and locker numbers, locations, and any usage rules.
- State that only registered vehicles may park. Prohibit storage of hazardous items in lockers.
13) Move-in conditions and key release checklist.
- List the items needed before key release: proof of insurance, proof of utilities set-up (if applicable), and the last month’s rent deposit if not already paid.
- List who will meet, when, and where to hand over keys. Include a move-in inspection process, with photos if you wish.
14) Screening conditions, if the offer is conditional.
- If you need credit, income, or references, add a clear condition with a deadline. State what documents the tenant must provide. State how the condition is fulfilled or waived.
- Keep the condition clear and short. State that the information will be used only to assess the application.
Example condition:
- “This offer is conditional on the Landlord reviewing and approving the Tenant’s credit report, employment letter, and two references within three business days. If not waived or fulfilled in writing by the deadline, this offer becomes null and void, and the deposit is returned.”
15) Guarantor clause, if needed.
- Identify the guarantor by full legal name. State that the guarantor guarantees all tenant obligations. Make it joint and several. State that the guarantee survives any lawful renewal or assignment unless released in writing.
- Attach a signed guarantor schedule with contact details.
16) Communications and delivery.
- Set email addresses for routine communications and delivery of documents.
- Allow electronic signatures and counterparts.
- State that statutory notices will follow legal service rules.
17) Standard lease and consistency across documents.
- Require both parties to sign the provincial standard lease within a set time after acceptance. Ten days is common.
- State that Schedule B terms will be inserted into the standard lease or attached as an addendum. If there is a conflict, the law governs, and the accepted agreement guides the result.
18) Conflict, severability, and entire agreement.
- Add a clause that this schedule forms part of the agreement.
- If desired, add that the terms of this schedule prevail over any pre-printed terms in case of conflict. Remember that law prevails over all documents.
- Add severability. If one clause is invalid, the rest remains in force.
- Confirm the entire agreement, subject to the standard lease to follow.
19) Review for compliance and clarity.
- Remove any term that conflicts with the law. Common risk areas are damage deposits, post-dated cheques, and no-pet bans.
- Check dates, dollar amounts, and names. Make sure they match the main form.
- Number your clauses. Use headings for longer schedules.
20) Execute and initial each page.
- Ensure both parties initial each page of Schedule B.
- Attach all referenced documents. Label them as additional schedules if needed.
- Deliver the full package before the irrevocable time on the main form.
Practical drafting tips
- Use plain words. Avoid jargon and vague phrases like “as necessary.”
- Be specific with numbers. State amounts, deadlines, and coverage limits.
- Tie duties to events. For example, “before key release” or “within two business days.”
- Avoid automatic penalties. Instead, confirm duties and reserve the right to claim actual costs or lawful remedies.
- Align with building rules if the property is a condo or co-op. Provide a copy or a clear delivery plan.
Real-world example
You lease a one-bedroom condo with one parking space and a locker. The building requires a booked elevator, a refundable moving deposit, and proof of insurance from the mover. Your Schedule B will:
- List included items: five appliances, window coverings, and light fixtures.
- State the tenant pays hydro and internet. Water and gas are included.
- Require proof of tenant liability insurance for $2,000,000 before key release.
- Attach the building rules. Require compliance with booking policies, deposit amounts, and move hours.
- Identify parking P2-47 and locker L3-12. Prohibit storage of flammables.
- Provide two fobs and two keys with a refundable $100 fob deposit.
- Confirm a professional clean before possession and the return condition at end of term.
- Set showing windows for the last 60 days, on 24 hours’ notice.
- Confirm email addresses for communications and allow electronic signatures.
- Require the standard lease be signed within ten days. Carry all Schedule B terms into that document.
If you follow these steps, you will produce a clear, enforceable Schedule B. You set expectations up front. You reduce the chance of disputes. You also move the deal to closing faster, with fewer back-and-forth questions.
Legal Terms You Might Encounter
- Schedule B is an addendum. It adds or changes terms in the Agreement to Lease. You use it to tailor details that the standard form does not cover. Examples include utilities, keys, parking, maintenance, pet rules, and insurance. When drafted clearly, Schedule B prevents disputes later.
- An agreement to Lease is the offer and acceptance document. It sets the binding terms for the tenancy that will follow. Schedule B forms part of that agreement. If the parties later sign a longer lease, those terms should match what you agreed here.
- Irrevocable period is the time window during which your offer stays open. You cannot withdraw it during that period. If the landlord accepts within that time, you have a deal. Schedule B often sets related timelines, such as when to deliver documents or deposits.
- Acceptance is when the other side signs and communicates that acceptance. Initials alone are not acceptable. Once acceptance occurs within the irrevocable period, all terms in Schedule B become binding. Any change after that needs a signed amendment.
- Deposit is the amount you pay to secure the agreement. In residential leasing, it often covers the first and last month’s rent. Schedule B states how and when you deliver it. It can also set where it’s held and what happens if a payment method fails.
- Conditions (sometimes called condition precedent) are terms that must be met for the deal to proceed. Common examples include references, employment verification, credit checks, or insurance. Schedule B should state who must do what, by when, and how to confirm fulfillment or waiver.
- Chattels and fixtures describe what stays with the unit. Fixtures are attached and usually stay. Chattels are movable items like appliances or window coverings. Schedule B should list all included items and any exclusions. Clear lists avoid move-in surprises.
- Vacant possession means you get the unit free of occupants and belongings not included. It also means you can move in on the start date without interference. If the unit is tenant-occupied when you sign, Schedule B should confirm the plan to deliver vacant possession.
- Assignment and subletting control whether you can transfer your lease or sublet the unit. Schedule B can restrict or allow these options, with or without consent. If consent is needed, spell out the criteria and timing. That protects both sides from last-minute surprises.
- Indemnity and liability allocate risk. Some clauses say you will cover losses caused by your actions or guests. Others limit a party’s responsibility in certain cases. In Schedule B, keep the indemnity language specific, so you know what is covered and what is not.
- Default and remedies describe what happens if a party does not do what they promised. Default may include non-payment or rule breaches. Remedies might include notices, fees, or termination processes. Use Schedule B to set practical steps, such as cure periods and written notice methods.
- Notices explain how you give formal communications to each other. This can include email, courier, or hand delivery. If you use email, list the exact addresses that count for notice. Schedule B should choose methods and timing so you know when a notice takes effect.
FAQs
Do you need Schedule B if the standard form covers most terms?
You do not have to use Schedule B. But you should use it if you need clarity beyond the standard text. If anything matters to you—like appliances, parking, repairs, or a pet rule—put it in writing in Schedule B.
Do you attach more than one schedule?
Yes. You can attach multiple schedules if needed. Use clear labels (for example, Schedule B, Schedule C). Reference each one in the Agreement to Lease. Make sure the page count and labels appear on the signing pages.
Do you have to initial each page of Schedule B?
You should. Initials confirm both sides saw the entire addendum. Ask all parties to initial each page. Make sure signatures appear at the end of the schedule or the main signature page referencing the schedule.
Do electronic signatures count on Schedule B?
Yes, if permitted by the parties. Use a reliable e-signature method. Ensure the signed document shows date and time stamps. Keep one complete executed version with all schedules attached.
Do you list appliances and furnishings in Schedule B?
Yes. List every included chattel by name. If practical, list a model or quantity. Include any items to be removed before move-in. A complete list avoids disputes over missing or broken items.
Do you set who pays for utilities in Schedule B?
Yes. State each utility and who pays it. If utilities are shared or sub-metered, explain how charges are calculated. If you agree to a cap or contribution limit, write the amount and the billing method.
Do you handle pet and smoking rules in Schedule B?
Yes. If the building or landlord has rules, put them in Schedule B. Spell out what is allowed and what is not. Note any extra cleaning or damage provisions. Precision helps avoid misunderstandings later.
What happens if Schedule B conflicts with another term?
First, avoid conflicts by drafting carefully. If one appears, fix it before acceptance. If discovered after, use a written amendment signed by everyone. Include a priority clause if you expect overlap, so it’s clear which term controls.
Checklist: Before, During, and After the OREA Form 401 – Schedule B – Agreement to Lease – Residential
Before signing
- Confirm legal names for all tenants and the landlord.
- Verify the full municipal address and unit number.
- Decide the term, start date, and end date.
- Specify rent amount, due date, and payment method.
- Confirm the deposit amount and when it is due.
- List all chattels and fixtures included or excluded.
- Clarify parking and locker numbers, location, and fees.
- Identify all utilities and who pays for each.
- Define maintenance duties: lawn, snow, filters, bulbs, smoke alarms.
- Note renovation or cleaning to be completed before move-in.
- Decide on pet and smoking rules and any related conditions.
- Confirm insurance requirements and proof of insurance timing.
- Set any conditions: references, credit, employment letter, IDs.
- Choose notice methods: email addresses, service times, and mailing addresses.
- Gather supporting documents: photo ID, references, proof of income, credit report, and rental application.
- Prepare any attachments: move-in condition form, inventory list, building rules, parking plan.
During signing
- Check that Schedule B is referenced in the Agreement to Lease.
- Confirm page numbers and that all pages are present.
- Verify legal names, dates, and signatures match across all pages.
- Ensure every page is initialed by all parties.
- Confirm the irrevocable period and acceptance deadline.
- Check deposit details: amount, payee, delivery method, and due date.
- Review condition deadlines and the process to fulfill or waive.
- Confirm rent start date, rent proration if mid-month, and key handoff timing.
- Verify parking and locker identifiers match building records.
- Make sure utilities and any caps or credits are precise and measurable.
- Verify insurance clause and timing for proof of coverage.
- Confirm access terms for showings, repairs, and emergencies.
- Ensure any renovation or cleaning commitments have dates and standards.
- Review assignment/subletting language and consent rules.
- Re-read default and remedies clauses for clarity and fairness.
After signing
- Circulate a complete executed copy to all parties.
- Deliver the deposit as stated and obtain a receipt.
- Calendar all conditions with due dates and times.
- Send written notices of fulfillment or waiver before deadlines.
- Store the executed agreement and Schedule B in one secure file.
- Share move-in instructions, contacts, and building rules.
- Set up utilities as assigned in Schedule B.
- Obtain and share an insurance binder before key release, if required.
- Schedule pre-move and move-in walkthroughs and document the unit’s condition.
- Confirm key pickup, fobs, mail keys, and any deposits.
- Keep a communication log for any post-signing commitments.
- If a longer lease is required later, align it with Schedule B terms.
Common Mistakes to Avoid OREA Form 401 – Schedule B – Agreement to Lease – Residential
Leaving utility responsibility vague.
- If you do not state who pays for heat, hydro, water, or internet, expect disputes and unpaid bills. Don’t forget to list each utility and who pays.
Forgetting to list all chattels and fixtures.
- Missing items lead to conflict on move-in day. Don’t forget to list appliances, window coverings, remotes, and any furniture.
Missing condition deadlines.
- If you miss a condition deadline, your condition may be deemed not satisfied. That can sink the deal. Don’t forget to calendar each deadline and send written notices.
Allowing conflicting clauses.
- A conflict between the standard form and Schedule B can create risk. Don’t forget to align the language and add a priority clause if needed.
Vague renovation or cleaning promises.
- “Unit will be clean” is unclear. Don’t forget to set a standard, date, and scope, like “professionally cleaned before key release.”
What to Do After Filling Out the Form OREA Form 401 – Schedule B – Agreement to Lease – Residential
Confirm acceptance in writing.
- Ensure acceptance occurs within the irrevocable period.
- Share the fully signed package with all parties.
Deliver the deposit and confirm receipt.
- Send the deposit as stated in Schedule B.
- Get a dated receipt that shows the amount and method.
Track and satisfy conditions.
- Collect references, employment letters, and any other required documents.
- Send written fulfillment or waiver by the deadline, as permitted.
- Keep proof of delivery for all notices.
Align any follow-on lease documents.
- If a longer or government lease is required, prepare it to match Schedule B.
- Cross-check rent, term, utilities, and included items for consistency.
Prepare for move-in.
- Set key exchange date and location.
- Arrange elevator booking if needed.
- Complete a walkthrough and condition report with photos.
- Record meter readings if utilities are tenant-paid.
Set up accounts and insurance.
- Open utility accounts for the start date if you are responsible.
- Provide proof of tenant insurance if required before keys.
Manage amendments if something changes.
- Use a written amendment if you need to change dates, rent, or clauses.
- Have all parties sign and circulate the updated document.
Distribute and store documents.
- Send complete, signed copies to everyone involved.
- Store one final version with all schedules and attachments.
- Keep a checklist of post-signing commitments and completion dates.
Plan communication.
- Share contacts for building management, the superintendent, and emergency issues.
- Confirm the procedure for repair requests and entry notices.
Final verification before possession.
- Confirm that agreed repairs or cleaning are complete.
- Re-check that utilities and insurance are active.
- Confirm parking and locker access and all keys or fobs are accounted for.
Disclaimer: This guide is provided for informational purposes only and is not intended as legal advice. You should consult a legal professional.