RTB-40 – Tenant’s Direct Request Worksheet
Fill out nowJurisdiction: Canada | British Columbia
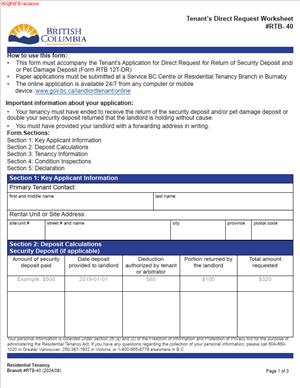
What is an RTB-40 – Tenant’s Direct Request Worksheet?
The RTB-40 is a tenant-focused worksheet that helps you prepare a Direct Request for a simple, document-based decision. You use it to claim money the landlord must return without a hearing. Most tenants use it to recover a security deposit, a pet damage deposit, or both, plus interest. In many cases, you can also claim double the deposit if the landlord missed legal deadlines.
The worksheet organizes the facts the decision-maker needs. It guides you to confirm eligibility, list dates, calculate interest, and set out your total claim. It also helps you organize your evidence. This matters because a Direct Request is decided on your documents alone. A clear, complete worksheet increases the chance of a quick, enforceable order.
Who uses this form?
Residential tenants in British Columbia. That includes fixed-term and month-to-month tenants. It can include subtenants in covered rentals. It does not apply to commercial leases or excluded types of housing.
Why would you need it?
Use it when your landlord fails to return your deposit on time after you move out and give your new address in writing. Use it when the landlord made deductions you did not agree to and did not have an order for. Use it when the landlord ignores your requests or delays without a lawful reason. The worksheet helps you present a clean record of what happened and what you are owed.
Typical usage scenarios
- You moved out on June 30. You emailed your forwarding address that day. No money arrived by July 15. You want your deposit back with interest, and possibly double the deposit because the deadline passed.
- You paid a pet deposit and a security deposit. The landlord kept all of it without a move-out inspection or a written settlement. You seek the return of both deposits with interest and a double-deposit award.
- The landlord returned part of your deposit without your consent. They offered no invoices or orders. You did not agree to the deduction. You want the remainder, interest, and any additional amount allowed by law.
- The landlord promised to apply for dispute resolution about damages, then never filed. The deadline ran out. You want your deposit back in full with interest, and double if eligible.
In each situation, the worksheet helps you show clear dates, amounts, and documents that support a Direct Request. It ensures you present only the issues a Direct Request can decide. It keeps your claim narrow, fast, and strong.
When Would You Use an RTB-40 – Tenant’s Direct Request Worksheet?
Use it when you qualify for an expedited, document-only decision as a tenant. The most common trigger is a missed 15‑day deadline. After you move out and give your forwarding address in writing, the landlord has a short window. They must either return your deposit(s) with interest or file a claim to keep some or all of it. If they do neither within the deadline, a Direct Request is often available. The worksheet is designed for that scenario.
Here are practical examples:
You handed in keys on September 1 and sent your new address by text and email the same day. You attached proof in your worksheet. The landlord did not pay or file within the deadline. A Direct Request lets you ask for the deposit back with interest and double the deposit.
You and the landlord did not complete a move-out condition inspection. The landlord then kept the deposit without your written consent or an order. A Direct Request can be suitable because the issue is narrow and document-based. Your worksheet shows the missed inspection, the dates, and the money claimed.
You received a partial payment after the deadline. No written consent supports the landlord’s deduction. You still use a Direct Request if the claim fits the process. Your worksheet sets out the deposit paid, partial amount received, and the balance claimed with interest.
You are a subtenant who paid a deposit to a head tenant. The head tenant did not return it after you moved out and gave your forwarding address. If your tenancy is covered, you can use the same approach. Your worksheet names the correct respondent and shows your deposit payment and exit dates.
There are also situations when you should not use a Direct Request. If the landlord filed a dispute within the deadline, the case will go to a regular hearing. If you never gave your forwarding address in writing, a Direct Request is not available. If you agreed in writing to an extension of the deadline or to a deduction, your claim changes. If your dispute is complex or needs witness testimony, a regular application is the safer route. The worksheet can still help you organize facts, but the proper process would not be Direct Request.
As a rule of thumb, use the worksheet when the claim is simple and documentary. Focus on deposits, deadlines, and basic interest. Avoid adding unrelated issues like repairs, rent abatements, or compensation for other losses in this request. Those belong in a standard application.
Legal Characteristics of the RTB-40 – Tenant’s Direct Request Worksheet
The worksheet itself is not a legal order. It does not bind the landlord by itself. It is a supporting document for a Direct Request application. It helps the decision-maker assess your claim quickly. If your Direct Request is granted, the resulting monetary order is binding. You can enforce it if the landlord does not pay.
Why is a Direct Request order enforceable?
The decision-maker has statutory authority to decide certain tenancy claims. A valid decision under that authority creates a monetary order. You can file that order in Small Claims Court to enforce payment if needed. The strength of your order depends on two things. First, your eligibility for the Direct Request process. Second, the completeness and reliability of your documents.
What ensures enforceability?
Accuracy, clear timelines, and proper proof. You must show that you gave your forwarding address in writing. You must show the date you moved out. You must show the amount and date of each deposit payment. You must show what the landlord did or did not do within the deadline. Include written communications, inspection reports, and receipts. Keep everything legible and organized. The worksheet helps you do that.
You must also meet service and evidence rules for the process. In Direct Request, decisions are made on your documents only. You do not rely on live testimony. Sworn statements can help if facts need confirmation. Use a dated declaration when your evidence is a statement of fact without a separate document. List and label every exhibit you rely on. Mislabeled or missing documents can sink a Direct Request.
Consider timing. Monetary claims are subject to limitation periods. As a practical guide, do not delay. File within two years of the end of the tenancy or when the claim arose. If you wait too long, you risk dismissal.
Finally, do not overreach. Claim only what the process allows. Deposits, interest, and the double-deposit remedy are standard for tenants in this context. Claims for damages, rent disputes, or broader compensation need a regular application. The worksheet is built for the narrow deposit pathway. Stay within that lane to keep your order enforceable.
How to Fill Out an RTB-40 – Tenant’s Direct Request Worksheet
Follow these steps. Keep your answers precise, dated, and supported by documents.
1) Confirm you qualify for a Tenant Direct Request.
- You moved out of the rental.
- You gave your forwarding address to the landlord in writing.
- The landlord did not return the deposit(s) with interest within the deadline.
- The landlord did not file a dispute within the deadline.
- You did not agree in writing to extend the deadline or to deductions.
If any of these are missing, speak with counsel or use a regular application.
2) Gather your documents.
- Tenancy agreement showing names, address, and deposit amounts.
- Proof of deposit payment(s). Use receipts, bank records, or e‑transfers.
- Proof of move-out. Use the move-out inspection report, key return email, or a dated handover note.
- Your forwarding address in writing. Use an email, text, letter, or form. Include proof of delivery.
- Any landlord communication about the deposit. Include dates and amounts paid, if any.
- Condition inspection reports for move-in and move-out, if available.
- A simple interest calculation for each deposit.
3) Complete the party details.
- Write your full legal name. If multiple tenants paid the deposit, list all names.
- Write the landlord’s legal name. If it is a company, use the full corporate name.
- Add the landlord’s service address, email, and phone if known.
- If there is a property manager, list them as the agent and add contact details.
4) Fill in the tenancy details.
- Rental unit address, including suite number.
- Tenancy start date and end date.
- Monthly rent amount.
- Security deposit amount and date paid.
- Pet damage deposit amount and date paid, if any.
- Note who received the deposit (landlord or agent).
5) Record the forwarding address details.
- State the exact date you sent your forwarding address in writing.
- Identify the method used. Email, text, hand delivery, or mail.
- Attach proof of delivery. Screenshots, email headers, or a delivery receipt.
- If you sent more than one notice, list each date and method.
6) Describe what happened after move-out.
- Did the landlord pay any amount? List amounts and dates received.
- Did you sign any agreement to allow deductions? If yes, attach it.
- Did the landlord say they would file a claim? Include that message and the date.
7) Calculate interest on deposits.
- Interest is owed from the date the deposit was received to the date the tenancy ended.
- Use the prescribed annual rate for each calendar year.
- Calculate it year by year. Pro‑rate for partial years.
- Do not compound the interest.
- Show your math on the worksheet. Example:
Example:
- Security deposit: $500 paid March 1, 2020.
- Tenancy ended April 30, 2023.
Interest steps:
- 2020: Pro‑rate March 1 to December 31 at the 2020 rate.
- 2021: Full year at the 2021 rate.
- 2022: Full year at the 2022 rate.
- 2023: Pro‑rate January 1 to April 30 at the 2023 rate.
Add each year’s interest. Total the interest across all years. Repeat for the pet deposit if applicable. Attach a one‑page schedule that shows the dates, rates, and amounts.
8) Determine if you can claim double the deposit.
- You can usually claim double if the landlord missed the deadline.
- You must have given your forwarding address in writing.
- There must be no written agreement to extend the deadline.
- The landlord must not have filed a dispute within the deadline.
- If these are met, the worksheet should show a claim for double the deposit amount(s).
Explain this clearly. Example text:
“I gave my forwarding address on June 30 by email. The landlord did not return the deposits or file a dispute by July 15. I claim double the security and pet deposits as allowed.”
9) Set out your total claim.
- Line 1: Security deposit amount.
- Line 2: Pet damage deposit amount.
- Line 3: Interest total on both deposits to the tenancy end date.
- Line 4: Double-deposit amount, if eligible.
- Line 5: Less any amount you already received.
- Claim total: Sum the lines, showing a clear final amount.
Keep the math visible, round to the nearest cent. If you are not claiming double, remove that line and state why.
10) List and label your evidence.
- Create an exhibit list. Label each document as Exhibit A, B, C, and so on.
- Use short titles. For example: “Exhibit A: Tenancy Agreement (signed, dated),” “Exhibit B: Deposit receipt March 1, 2020,” “Exhibit C: Forwarding address email June 30, 2023,” “Exhibit D: Move‑out inspection report,” “Exhibit E: Interest calculation schedule.”
- Attach legible copies. Ensure dates and amounts are visible.
- If you rely on a text message, include a screenshot with the date and sender.
11) Add your declaration and signature.
- If the worksheet includes a declaration, sign and date it.
- If not, include a one‑paragraph signed statement. Confirm the facts are true to the best of your knowledge.
- Ensure your application form is signed and dated as well.
12) File the application and the worksheet together.
- Submit your Direct Request application with the completed worksheet and exhibits.
- Pay the filing fee, or include a fee‑waiver request if applicable.
- Keep copies of everything you file. Save them as a single, organized package.
13) After you file.
- The decision-maker will review your documents without a hearing.
- You may be asked for missing pages or clearer copies. Respond quickly.
- If granted, you receive a monetary order for the amounts allowed.
- If the landlord does not pay, you can enforce the order.
Tips for a stronger worksheet:
- Be consistent with dates across all documents.
- Do not include unrelated claims. Focus only on deposits and interest.
- Avoid assumptions. If you do not have a document, explain why.
- Use simple language. Short sentences help the decision-maker see the facts fast.
- Check interest rates carefully. Use the correct rate for each year.
Common pitfalls to avoid:
- Forgetting to include proof of your forwarding address in writing.
- Misstating the tenancy end date or key return date.
- Claiming deductions you agreed to in writing.
- Using a rounded interest or the wrong rate.
- Submitting unreadable screenshots or cropped images.
A clean worksheet does more than show numbers. It tells a short, credible story: when you moved in, what you paid, when you moved out, when you sent your address, and what the landlord failed to do. Support each point with a dated document. Do that, and your Direct Request stands on solid ground.
If you have multiple tenants on the lease, decide who will apply. Either list all applicants or authorize one tenant to file. If the deposit was paid by one tenant only, explain that in the worksheet. If the landlord is a company, make sure you identify it correctly. Use the full legal name, not just a trade name.
Finally, match your remedy to your facts. If the landlord returned the deposit late but within the deadline after you supplied your address, claim interest only. If they paid after the deadline, assess whether the double-deposit remedy still applies. State how you calculated your claim and why the remedy is available. Keep your focus tight. That is how you secure a fast, enforceable decision.
Legal Terms You Might Encounter
- Direct Request means a streamlined process where a decision is made from documents only. You do not attend a live hearing. With the RTB-40 – Tenant’s Direct Request Worksheet, you prepare evidence up front. The decision-maker reviews your package and issues a written result.
- Applicant is you, the person completing RTB-40. You start the process and carry the burden to prove your claim. Your name and contact details must match your identification and lease documents.
- Respondent is the other party. In this worksheet, it is usually your landlord or their agent. You must list the correct legal name and a service address where they can receive documents.
- Remedy is what you ask the decision-maker to order. This worksheet often includes a monetary order, a refund of a deposit, or a cancellation of a charge. State each remedy clearly and give the amount for each, if known.
- Monetary Order is a written decision that says one party owes money to the other. If you seek the return of a security or pet deposit, you are asking for a monetary order. You may also claim interest or a filing fee, if allowed.
- Security Deposit is money you paid at move-in to cover possible damage or unpaid rent. A Pet Damage Deposit is similar but limited to pet-related issues. In this worksheet, you may seek a return of one or both, with proof of payment and move-out compliance.
- Service means delivering your filed documents to the respondent using an approved method. You must serve the application, evidence, and any notice from the authority. Your application can fail if you do not serve properly or cannot prove service.
- Proof of Service is your evidence that the respondent received the documents. That can be a delivery receipt, affidavit, photo of the envelope, or a tracking record. Attach it promptly when the authority asks, or your application can be dismissed.
- Evidence is any document, photo, message, receipt, ledger, or inspection report that supports your claim. With a Direct Request, strong evidence is essential because there is no live testimony. Use the worksheet to label and explain each piece of evidence.
- Declaration is a signed statement where you confirm the truth of your application. RTB-40 includes a declaration section. Sign only after reviewing your facts and numbers. False statements can lead to dismissal or penalties.
- Limitation Period is the deadline to bring your claim. If you wait too long, you may lose your right to apply. This worksheet asks for dates that help the decision-maker check timeliness.
- Conversion means your application is moved from Direct Request to a regular hearing. This can happen if facts are disputed or evidence is lacking. Conversion delays a decision and can require your attendance at a hearing.
- Compliance Deadline is the date by which the other party must follow the order. If they do not comply, you can consider enforcement options. Keep your order and proof of service ready if enforcement becomes necessary.
FAQs
Do you qualify to use a Tenant’s Direct Request?
Yes, if your issue fits the limited categories allowed for Direct Request. This usually covers simple, document-based monetary claims. Common examples include the return of a deposit or a refund of a prohibited fee. If your case involves complex facts or live testimony, you may need a regular hearing instead.
Do you need a hearing for RTB-40?
No. Direct Request is decided on documents only. You submit the worksheet, evidence, and declaration. The decision-maker reviews your package and issues a written decision. If the case is not suitable, it may be converted to a regular process.
What evidence should you include with RTB-40?
Include the lease, proof of rent and deposit payments, move-in and move-out inspection reports, notice of your forwarding address, and any written communications. Add photos, bank statements, or ledgers that show amounts and dates. Label each exhibit and explain its purpose in the worksheet.
Do you have to serve the landlord?
Yes. You must serve the filed application and evidence on the respondent. Use an approved method and keep verifiable proof. If service is challenged, the decision-maker will look at your proof. If service fails, your application may be dismissed.
Do you pay a filing fee, and can you recover it?
There is usually a filing fee. You can request reimbursement as part of your remedies. The decision-maker may add the fee to your monetary order if you win. If you qualify for a fee waiver, apply at filing and keep the confirmation for your records.
How fast will you get a decision?
Timelines vary. Direct Request is generally faster than a full hearing. Your timing depends on how complete your documents are and the current processing volumes. Accurate service and clear evidence help avoid delays.
Can you change your claim after filing?
You can ask to amend before a decision is made. Provide updated pages and an explanation for the change. If the change is significant, the authority may require re-service or conversion to a regular hearing. If the decision has already been issued, you must file a new application.
What happens if the landlord does not respond?
The decision-maker can proceed without a response if service is proven. You may receive a default decision based on your documents. This still requires proper proof of service and sufficient evidence to support your claim.
Do you need to include interest on your claim?
You can request interest if allowed. Show how you calculated it and from what date. If you are unsure, focus on principal amounts and explain your method. The decision-maker may adjust interest in the order.
What if you moved out already?
You can still use RTB-40 if your claim fits the Direct Request rules. Provide your move-out date, inspection documents, and forwarding address proof. Timelines still apply, so file promptly and include all evidence of communication after move-out.
Checklist: Before, During, and After the RTB-40 – Tenant’s Direct Request Worksheet
Before you sign
- Confirm your eligibility for a Direct Request. Check that your claim is document-based and within limits.
- Gather your full legal name and current contact details.
- Confirm the respondent’s legal name and a valid service address.
- Find your tenancy agreement and any amendments.
- Collect proof of payment for deposits and rent (receipts, bank statements).
- Gather move-in and move-out inspection reports and photos.
- Prepare proof that you gave your forwarding address in writing.
- Compile messages, letters, or notices that show promises or refusals.
- Build a simple timeline with key dates and amounts.
- List your remedies and amounts, including any fee reimbursement request.
- Check the limitation periods based on your dates.
- Scan or photograph all evidence so it is clear and readable.
- Name your files with dates and short descriptions.
- Confirm how you will serve the respondent and track proof.
During signing and completion
- Verify your name, address, phone, and email for accuracy.
- Confirm the respondent’s name and service address match your evidence.
- Enter tenancy start and end dates exactly as in the lease.
- State each remedy clearly and assign dollar amounts.
- Double-check your math for totals and interest, if claimed.
- Explain each exhibit briefly in the worksheet where prompted.
- Ensure every page is legible, numbered, and oriented correctly.
- Cross-check dates in your timeline against documents.
- Review the declaration carefully before you sign.
- Remove duplicates and irrelevant material that adds confusion.
- Save a complete copy of everything you will file.
After signing
- File the worksheet and all evidence using the accepted method.
- Pay the filing fee or submit a fee waiver request.
- Record your file number and the date filed.
- Serve the field package on the respondent using an approved method.
- Keep proof of service that shows when and how service occurred.
- File your proof of service if required or when asked.
- Watch for messages from the authority and respond promptly.
- If asked for more information, submit it quickly with clear labels.
- Track the decision date and any compliance deadlines.
- Store your full file and decision in one secure place.
- If you receive an order, plan how you will serve it and monitor compliance.
Common Mistakes to Avoid
- Using Direct Request for the wrong issue. If your claim needs live testimony or credibility findings, it may be converted or dismissed. Don’t forget to confirm that your claim fits the Direct Request categories.
- Incorrect or missing party information. A wrong legal name or an invalid service address can derail your case. Don’t guess—check the lease, rent receipts, or official records.
- Poor service or no proof of service. If you cannot prove service, your claim can be dismissed. Don’t forget to keep delivery receipts, tracking numbers, or signed acknowledgments.
- Weak or incomplete evidence. Missing proof of payment, inspection reports, or forwarding address notices can sink your claim. Don’t forget to include legible copies and explain each exhibit.
- Math errors and unclear remedies. If your totals or interest calculations are wrong, the order may be reduced or delayed. Don’t forget to show your math and list each remedy separately.
- Late filing. If you miss the time limit, your claim may be barred. Don’t wait—file as soon as your claim is ready.
What to Do After Filling Out the Form
- Review your package. Give yourself one last read-through. Confirm that exhibits match the claims in your worksheet. Check every date and amount. Ensure your declaration is signed and dated.
- File your application. Use the accepted submission method. Include the worksheet, evidence, and fee or fee waiver request. Save the confirmation and file number immediately. Note the date and time of filing.
- Serve the respondent. Serve the exact package you filed. Use an approved method that gives you proof. Follow the timing rules. Keep all receipts, tracking records, and photos of the addressed envelope or email headers, if applicable.
- Prove service. If the authority requires proof, file it promptly. Label it clearly. Explain how and when the service occurred, and to whom. Attach supporting receipts or screenshots.
- Respond to any follow-up. You may be asked for more information or clearer copies. Reply quickly with labeled exhibits. Fast responses prevent conversion or delay.
- Track your case. Mark calendar reminders for any deadlines. Check your account or inbox for updates. Read every message from the authority. Follow instructions exactly.
- Amend if needed. If you find a material error, request an amendment before a decision is issued. Provide corrected pages and an explanation. Be ready to re-serve if required.
- Wait for the decision. The decision-maker will review your documents and issue a written decision. Read it carefully. Confirm what remedies were granted and the deadlines for compliance.
- Serve the decision. Provide a copy to the respondent using an approved method. Keep proof of service. Serving the decision helps with compliance and any later enforcement.
- Monitor compliance. If money is ordered, set a payment deadline reminder. If payment arrives, confirm the amount matches the order. Save proof of payment.
- Consider the next steps if no compliance. If the respondent does not comply, review your enforcement options. You may need certified copies or additional steps. Keep every record to show your efforts.
- Close your file. Once complete, archive your worksheet, decision, proof of service, and payment records. Keep them for reference in case issues arise later.
Disclaimer: This guide is provided for informational purposes only and is not intended as legal advice. You should consult a legal professional.