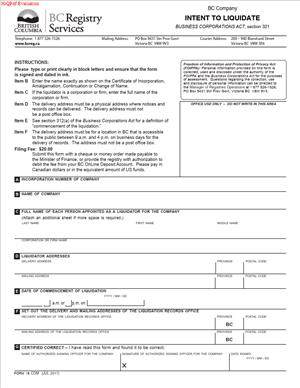
Form 18 – Statement of Intent to Liquidate
Fill out nowJurisdiction: Country: Canada | Province/State: British Columbia
What is a Form 18 – Statement of Intent to Liquidate?
A Form 18 — Statement of Intent to Liquidate is the formal filing that starts a voluntary liquidation for a company incorporated in British Columbia. When you file it with the provincial corporate registry, you move the company from “operating” to “liquidating.” From that point, the company stops carrying on business except as needed for the liquidation. Control shifts to a liquidator, who gathers assets, pays debts, and distributes any surplus to shareholders. The filing also puts the public on notice that the company is winding up.
You use this form when the owners have decided to close the company in an orderly, structured way. It is not the same as a simple dissolution. A liquidation is a process with a liquidator in charge. It is designed to protect creditors, manage claims, and distribute what remains fairly and transparently.
Who typically uses this form?
Directors, corporate secretaries, and in‑house legal or finance leaders prepare and file it on behalf of the company. External counsel, accountants, or a professional liquidator often support the process. Small business owners also use it when they are ready to shut down and want a clean legal finish. Medium and large companies use it for reorganizations, post‑sale entity clean‑ups, or to simplify corporate groups.
Why would you need this form?
You file it to:
- Start a lawful liquidation overseen by a liquidator.
- Freeze most day‑to‑day operations and share transfers.
- Signal creditors to submit claims.
- Enable asset realization, debt settlement, and final distributions.
- Move toward formal dissolution, once all steps are complete.
Typical usage scenarios
- You sold the business assets and want to close the company. The company no longer needs to operate, but still holds cash. You need to pay off vendors, address tax and other liabilities, then distribute the balance to shareholders.
- A holding company has no further use after a reorganization. Liquidation allows you to wind it down properly and document distributions, including intercompany balances.
- The company is solvent but inactive. Liquidation gives you a structured exit that reduces the risk of forgotten liabilities surfacing later.
- You plan to return capital to investors and want to ensure creditors get proper notice and an opportunity to file claims.
- The group is simplifying its structure. You intend to merge operations into another entity and liquidate the redundant company to remove ongoing filing and compliance costs.
In each case, the Form 18 filing is the trigger. It marks the start of liquidation and establishes your legal footing for the steps that follow.
When Would You Use a Form 18 – Statement of Intent to Liquidate?
You use this form when the company’s owners have approved a voluntary liquidation. That decision usually follows a special resolution by shareholders. In practice, you file after you have confirmed the company is solvent, selected the liquidator, and ensured annual reports are current.
Business owners use it after a sale of assets or a strategic pivot. They may no longer need the corporate shell and want to return funds to owners. Finance leaders use it during post‑acquisition integration to remove entities and reduce costs. Directors use it when they want to wind down in a controlled, creditor‑aware manner rather than simply striking the company.
A voluntary liquidation suits a solvent company. If you cannot pay your debts as they come due, a voluntary liquidation may not be appropriate. Different processes may apply when the company is insolvent or when creditor enforcement has begun. In that case, you should assess your options before filing.
You also use this form when you want the protections and structure that liquidation offers. Filing puts the public on notice and curbs informal claims later. It helps you set a claims deadline and communicate clearly with creditors. It also clarifies that the liquidator will control the company’s affairs during the process.
This form is not used by a sole proprietorship or a partnership that is not incorporated. It is a corporate filing. If you operate an extraprovincial company, you typically close in your home jurisdiction and then cancel your provincial registration. Filing a statement of intent to liquidate applies to a company incorporated under provincial corporate law.
If you are a not‑for‑profit incorporated under different legislation, your wind‑up steps may differ. You may need a separate form or additional approvals. For a standard company incorporated in British Columbia, Form 18 is the expected first step when you choose a voluntary liquidation.
Legal Characteristics of the Form 18 – Statement of Intent to Liquidate
This filing is a statutory notice with legal effect. It is not a private document. Once accepted by the provincial corporate registry, it becomes part of the public record. Creditors, contractors, employees, and counterparties can rely on it to understand the company’s status. The filing is legally binding because the underlying corporate statute authorizes voluntary liquidation when the company and its shareholders follow the required steps.
Enforceability rests on proper approvals and accurate content. The company must pass the right shareholder resolution. The resolution typically authorizes the liquidation and appoints a liquidator. The filing must identify the company and the liquidator and state the effective date. The person who signs must have authority. The company must pay the filing fee. If you meet these conditions, the registry records the filing, and the liquidation begins.
The legal consequences are significant:
- Management powers shift. Directors’ and officers’ powers narrow. The liquidator assumes control for winding up.
- The company’s activities are narrowing. The company must stop carrying on business, except as needed for liquidation.
- Share transfers and certain changes are restricted. This protects the orderly distribution to creditors and shareholders.
- Creditor protections engage. The liquidator will notify known creditors and may publish a notice that sets a claims deadline.
- Distributions must follow a set order. Creditors are paid before shareholders. Any surplus then goes to shareholders according to their rights.
General legal considerations include solvency, notice, and record‑keeping. If the company is solvent, voluntary liquidation is typically straightforward. The liquidator must take reasonable steps to identify and notify creditors. They must keep detailed records, including receipts, disbursements, and decisions. They should preserve contracts, tax records, and governance documents. They must settle claims in line with legal priorities and ensure tax and regulatory liabilities are addressed.
Tax compliance matters. You should expect to prepare final returns and seek clearances from tax authorities before final distributions. You should also consider employee obligations, trust funds, sales taxes, and source deductions. The liquidator should confirm that all licenses and permits are closed properly, and that any trust or client funds are handled as required.
Finally, liquidation is a process with milestones and endpoints. After resolving claims and distributing assets, the liquidator prepares a final account. A final filing then dissolves the company. At that point, the corporate existence ends. Filing the Form 18 starts that journey and establishes the framework that carries through to dissolution.
How to Fill Out a Form 18 – Statement of Intent to Liquidate
Follow these steps to prepare and file the form correctly. Adjust the details to match your company’s structure and resolution.
1) Confirm readiness to liquidate
- Ensure the company is in good standing. File any overdue annual reports and address outstanding registry matters.
- Confirm the company is solvent. You should be able to pay known debts in full. If not, evaluate other processes before proceeding.
- Identify and vet the proposed liquidator. The liquidator may be a director, an officer, a professional, or a firm. Confirm they consent and can act.
- Gather your cap table, creditor list, key contracts, and bank information. You will need these during the liquidation.
2) Pass the required resolution
- Prepare a shareholder resolution authorizing the voluntary liquidation and appointment of the liquidator. Use the correct class voting if you have multiple share classes with voting rights.
- Include the liquidator’s name and service address. State the effective date of the liquidation. Clarify any limits on the liquidator’s powers if you intend to impose any.
- Record the vote outcome. Keep signed copies in the corporate records book.
3) Assemble core information for the form
You will need:
- Exact corporate name and incorporation number.
- The jurisdiction of incorporation (British Columbia).
- Registered and records office addresses.
- Liquidator’s full legal name and service address for delivery.
- The date the shareholders passed the liquidation resolution.
- The effective date of liquidation, if different from the resolution date.
- Name and capacity of the person who will sign the form.
4) Complete the form fields
- Company identification: Enter the exact name and incorporation number. Match what appears on the corporate registry.
- Registered and records office: Enter the current addresses. Update them first if they have changed recently, so the registry record is accurate.
- Liquidator details: Enter the liquidator’s name, mailing address, and email or phone if requested. The service address must accept deliveries during business hours.
- Effective date: State the date the liquidation begins. This often matches the resolution date unless you set a future date in the resolution.
- Authorizing statement: Confirm that shareholders approved the liquidation and appointed the liquidator by special resolution.
- Attachments: Indicate and attach schedules, if required. Common schedules include a certified copy of the shareholder resolution and any class‑specific resolutions.
5) Prepare schedules and attachments
- Shareholder resolution: Attach a certified copy. Include the text of the resolution, the vote results, and the date signed.
- Class resolutions: If different classes voted separately, attach each approving resolution.
- Liquidator consent: Some registries expect a separate consent. If not required, keep a signed consent on file anyway.
- Plan of liquidation: If the company approved a plan, attach it if the form requests it. If not, keep it in your records.
6) Review authority and signature
- Confirm the signatory’s authority. A director, authorized officer, or the liquidator typically signs. Follow the form’s instructions on who must sign.
- Use the exact signing name and title. Ensure the date of signing matches the filing date or is reasonably close.
- If you use an agent, include any required authorization.
7) File the form and pay the fee
- File with the provincial corporate registry. Use the current filing channel accepted for corporate forms.
- Pay the statutory filing fee. Keep the payment confirmation and stamped copy for your records.
- Note the effective date recorded by the registry. This date governs when liquidation formally begins.
8) Take immediate post‑filing steps
- Update internal and external stakeholders. Notify banks, key vendors, insurers, landlords, and contractual counterparties that the company is liquidating.
- Secure and safeguard assets. The liquidator should control bank accounts, inventory, intellectual property, and records.
- Plan creditor notices. Prepare and send notices to known creditors. Arrange for a public notice if the law or best practice requires it. Set a clear deadline for claims.
- Freeze share transfers and new issuances. Explain to shareholders that distributions will occur through the liquidation, after creditor claims are resolved.
9) Manage the liquidation process
- Collect receivables and realize assets. Evaluate sales timelines to preserve value.
- Review and adjudicate claims. Settle valid claims in line with legal priorities. Document the reasons if you dispute or disallow a claim.
- Address employee and contractor obligations. Pay earned wages, vacation pay, and statutory amounts due.
- Handle tax matters. File returns up to the liquidation date and for the liquidation period. Request tax clearances before final distributions.
- Maintain detailed accounts. Track all receipts and disbursements. Keep supporting documents and bank statements.
10) Prepare for dissolution
- Prepare the liquidator’s final account. Summarize all actions, distributions, and remaining assets, if any.
- Make final distributions to shareholders according to their rights. Respect any preferences and return of capital priorities.
- File the required final documents to dissolve the company. Once accepted, the company ceases to exist as a legal person.
Practical tips to avoid common errors:
- Match names and numbers exactly. Small mismatches can delay acceptance.
- Do not file if annual reports or name changes are pending. Clean these up first to avoid conflicts.
- Confirm the liquidator can receive service at the listed address. Missed notices can create risk.
- Keep all board and shareholder approvals in the minute book. Clear records help if questions arise later.
- Communicate early with creditors. Early notice reduces disputes and supports a smooth claims process.
- Consider banking logistics. Some banks require specific documents to transfer control to the liquidator.
Real‑world example:
You own a consulting company that has completed a sale of its contracts and transferred its employees to a buyer. The company holds cash and a few receivables. You and the other shareholders approve a liquidation and appoint a trusted director as the liquidator. You file the Form 18 with the corporate registry. The liquidator notifies creditors and sets a claims deadline. They collect receivables, pay final invoices, close the office lease, and handle taxes. After tax clearance arrives, the liquidator distributes the surplus to shareholders. The final account is prepared, and the company is dissolved. You achieve a clean exit with clear records and minimal risk of future claims.
Another example:
A corporate group has five holding companies after a reorganization. You decide to simplify. Three holdcos are solvent and unnecessary. For each, you approve a liquidation, appoint a liquidator, and file a statement of intent to liquidate. The liquidator transfers assets to the parent, addresses intercompany balances, and settles any third‑party payables. Once clearances are in place, the liquidator files to dissolve each entity. The group’s structure becomes leaner, and annual compliance costs drop.
Filling out Form 18 is straightforward once you have approvals and the right details. Treat it as the formal start to a careful, documented process. If you plan the steps above, you will move from filing to dissolution with fewer surprises and better outcomes for creditors and shareholders alike.
Legal Terms You Might Encounter
- Liquidation means turning your company’s assets into cash and paying debts in order. This form signals that you intend to start that process. It does not complete the liquidation.
- Dissolution is the legal end of the company. Liquidation usually comes first. Filing this form begins the path toward dissolution, but it does not dissolve you yet.
- Winding up is another way to describe the liquidation process. It covers selling assets, collecting receivables, and paying creditors. This form announces that winding up will begin.
- Special resolution is a shareholder approval with a higher threshold than a simple majority. Your governing documents or law set the exact threshold. You file this form after that approval, or confirm that approval will occur.
- Director resolution is a decision made by the board. Directors often authorize the liquidation process and the filing. This form usually reflects that authorization.
- Liquidator is the person or firm who manages the winding up. They sell assets and settle debts. Your form may identify a proposed liquidator or confirm how one will be appointed.
- Creditor means anyone your company owes money to. This includes suppliers, lenders, landlords, and employees. Filing this form sets the stage for notifying creditors and managing their claims.
- Secured creditor holds collateral as security for a debt. They have priority over related assets. You will address secured debts during liquidation, which this form anticipates.
- Statement of affairs summarizes your assets, liabilities, and equity at a point in time. You may prepare one for the liquidator and creditors. This form moves you toward compiling that information.
- Distribution is the transfer of remaining funds to shareholders after paying all claims. You cannot make distributions until creditor claims are settled. This form starts the process that leads to any distribution.
- Notice period is the time you allow creditors to file claims. It helps set a claims bar date. Filing this form is often the first notice to the world of your intent.
- Effective date is when a step becomes legally active. This form may ask for the date you intend to start liquidation. Set a realistic date, allowing for resolutions and notices.
- Revocation means withdrawing your intent before the process advances too far. Some regimes allow it if you meet conditions. This form can be reversed in limited cases, but act quickly.
- Claims bar date is the deadline for creditor claims. It helps the liquidator close the file and distribute surplus. Your form helps establish timelines that lead to that date.
- Priority of claims is the order in which debts must be paid. For example, secured claims usually come before unsecured claims. Filing this form begins the process of honoring those priorities.
- Realization means converting assets into cash. It includes collecting receivables and selling property. The form signals your plan to realize assets under supervision.
FAQs
Do you need shareholder approval before filing?
You usually need a special resolution from shareholders. Check your governing documents for the approval threshold. Get board approval as well. Complete your internal approvals before you file. This prevents delays and challenges later.
Do you stop operating immediately after filing?
Not always. You may continue only as needed to wind up the business. That includes collecting receivables or finishing critical obligations. Do not take on new long-term commitments. Your focus shifts to liquidation tasks, not growth.
Do you need to appoint a liquidator when you file?
Many companies identify a liquidator early. You can appoint one in your resolutions or in a later step. Name someone with financial and legal experience. If you delay, designate who will manage the interim. The registry may require the liquidator’s details later.
Do you notify creditors before or after filing?
File the form first to record your intent. Then issue written notices to known creditors. Publish notice if required by your rules. Set a clear claims deadline. Keep proof of all notices in your records.
Do you need to pay all debts before any distribution?
Yes. You pay debts in the required order before any shareholder distribution. Reserve funds for disputed or contingent claims. Keep a clear audit trail of every payment. Distribute surplus only after claims are closed.
Do you need to file tax returns during liquidation?
Yes. You continue to meet tax obligations through liquidation. File final returns after the last transactions. Request clearance if available. Keep tax records and receipts. Do not distribute surplus until your tax position is clear.
Do you need to withdraw the filing if you change your mind?
You may revoke only if the law and your documents allow it. Act before advanced steps occur. If creditors relied on your intent, revocation may be blocked. File the revocation documents promptly. Notify stakeholders in writing.
Do you need a plan for employee matters?
Yes. Address final payroll, vacation pay, and records. Comply with notice requirements if applicable. Provide statutory documents to employees. Confirm remittances are complete. Keep employee records for the required retention period.
Checklist: Before, During, and After the Form 18 – Statement of Intent to Liquidate
Before signing
- Corporate name and number, exactly as registered.
- Exact legal type (company, society, cooperative, or other).
- Current registered office address and mailing address.
- Names and addresses of current directors and officers.
- Up-to-date share structure or membership list.
- Board resolution authorizing liquidation and filing.
- Draft special resolution for shareholders or members.
- Proposed liquidator’s name, address, and consent to act.
- Preliminary statement of affairs (assets and liabilities).
- List of secured creditors and security details.
- List of material contracts and leases.
- Summary of employees, payroll, and accrued obligations.
- Tax account numbers and filing status.
- Any ongoing litigation or contingent claims.
- Banking details and signing authorities.
- Records retention plan and storage location.
- Filing fee and payment method.
During signing
- Confirm the exact legal name matches your records.
- Verify the registered office and mailing address fields.
- Check the director and liquidator details for spelling and accuracy.
- Confirm the effective date you intend to use.
- Ensure the correct capacity of the signer (director or officer).
- Confirm you included any required attachments.
- Review the resolution references and dates.
- Check that all mandatory fields are complete.
- Ensure the declaration and consent statements are accurate.
- Use ink if signing on paper; avoid corrections.
- If filing electronically, confirm the email for confirmations.
After signing
- File the form with the registry promptly.
- Obtain and save a stamped or confirmed copy.
- Calendar any follow-up filings and deadlines.
- Send written notices to known creditors.
- Issue public notice if your rules require it.
- Notify banks and freeze non-essential transactions.
- Inform insurers and adjust coverage to wind-up status.
- Advise employees and address the final payroll.
- Notify landlords, key suppliers, and service providers.
- Revoke or transfer licenses you no longer need.
- Secure and inventory assets under the liquidator’s control.
- Start collecting receivables and cancel unused services.
- Open a dedicated liquidation bank account if needed.
- Keep a master index of all liquidation records.
- Plan and file interim and final tax returns.
- Prepare for the final dissolution filing after liquidation.
Common Mistakes to Avoid
Filing before approvals are in place
- Consequence: Your filing can be challenged or delayed.
- Don’t forget to pass the board and shareholder resolutions first.
Vague or wrong effective dates
- Consequence: Confusion in notices and claim periods.
- Don’t forget to set a realistic date that fits your timeline.
Not naming or confirming a liquidator
- Consequence: No one is accountable for urgent wind-up tasks.
- Don’t forget to secure a liquidator’s consent and details.
Poor creditor notice and recordkeeping
- Consequence: Disputed claims and delayed distributions.
- Don’t forget to send timely notices and keep proof.
Mixing operating and liquidation funds
- Consequence: Tracing problems and potential liability.
- Don’t forget to use a separate account and detailed ledgers.
What to Do After Filling Out the Form
- File the form without delay. Confirm acceptance and keep the proof. Set up a centralized file for all liquidation records. Include the form, resolutions, notices, and confirmations.
- Appoint the liquidator if not already appointed. Obtain written consent to act. Set out the liquidator’s authority, reporting schedule, and fees. Transfer control of assets and records. Change the bank signing authority to the liquidator if required.
- Issue notices to creditors. Use the last known address for each creditor. Publish notice if your rules require it. Set a clear deadline for claims. Track returned mail and resend when possible. Log every notice and response.
- Secure your assets. Take possession of inventory and equipment. Change locks if needed. Cancel access for former users. Record serial numbers and conditions. Update insurance for the wind-up stage.
- Collect receivables. Send statements and demand letters. Negotiate settlements as appropriate. Record every payment and write-off. Keep supporting documents for audit and tax purposes.
- Review contracts and leases. Terminate or assign as permitted. Negotiate early exits to reduce costs. Document any settlement terms. Notify counterparties in writing.
- Verify employee obligations. Process final wages and vacation pay. Deliver required records of employment. Remit deductions on time. Confirm that benefits are closed and premiums settled.
- Prepare a claims register. List all known and filed claims. Identify secured and unsecured positions. Note disputes and any required reserves. Update the register as you resolve items.
- Realize assets. Sell assets in an orderly way. Use fair market methods and obtain valuations when needed. Record sales proceeds and related costs. Maintain a backup for each transaction.
- Pay creditors in the correct order. Start with secured claims against their collateral. Address trust amounts and statutory remittances. Pay unsecured claims according to priority rules. Document each payment and obtain releases.
- Handle taxes. File returns up to the final date. Pay balances and secure any available clearance. Keep all tax correspondence and assessments. Do not distribute surplus until tax matters are settled.
- Prepare interim accounts. Share summaries with stakeholders as required. Include receipts, payments, and remaining assets. Explain any major settlements. Keep the tone factual and clear.
- Make final distributions. Confirm all claims are resolved or reserved. Calculate shareholder entitlements based on final balances. Obtain acknowledgments for distributions. Retain proof for your records.
- Close remaining accounts and services. Cancel utilities, software, and maintenance. Archive necessary data securely. Destroy non-required data following policy. Keep physical records safe and indexed.
- File for dissolution after liquidation. Prepare final reports for the registry if needed. File the closing documents and pay any fees. Obtain confirmation of dissolution. Save all closing documents.
- Store records for the full retention period. Keep digital and physical copies secure. Ensure access for former stakeholders on request. Index your archive for quick retrieval. Set a reminder for the retention expiry date.
Disclaimer: This guide is provided for informational purposes only and is not intended as legal advice. You should consult a legal professional.