RTB-53-P3D – Notice of Additional Rent Increase – Eligible Capital Expenditures (Phase 3 Details)
Fill out nowJurisdiction: Country: Canada | Province/State: British Columbia
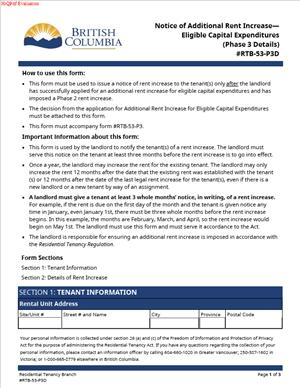
What is an RTB-53-P3D – Notice of Additional Rent Increase – Eligible Capital Expenditures (Phase 3 Details)?
The RTB-53-P3D is a Residential Tenancy Branch form used in Phase 3 of the capital expenditures process. You use it to give tenants the detailed breakdown behind a proposed additional rent increase tied to eligible capital projects. It sets out the actual work completed, the final costs, how you allocated those costs to units, and the per‑unit increase you plan to seek.
This form is part of a structured, multi‑step process for additional rent increases based on capital expenditures. Phase 1 introduces the project and estimated costs. Phase 2 collects tenant feedback and confirms scope. Phase 3 presents the final numbers and the exact rent increase proposal. The P3D is the “details” package that shows your math and proof. It helps tenants understand what changed, why it qualifies, and how you calculated the monthly amount.
Who typically uses this form?
Residential landlords and property managers of rental buildings covered by the Residential Tenancy Act. You might be a small landlord with a triplex or a manager of a high‑rise. Tenants do not fill out the form. They receive it and can respond to it.
Why would you need this form?
Because you finished (or substantially completed) major capital work and want to recover part of those costs through an additional rent increase. Examples include replacing roofs, boilers, elevators, building envelope cladding, or windows. These are not routine repairs. They are significant projects that extend the life of the property, improve health or safety, or lower operating costs.
Typical usage scenarios
- You replaced an aging boiler with a high‑efficiency system. You now have final invoices and commissioning documents. You need to show the eligible costs and propose a fair per‑unit increase.
- You completed an elevator modernization in a 12‑storey building. All invoices are in. You want to allocate costs to all affected units and explain the calculation.
- You undertook a building envelope rehabilitation. The work reduced drafts and moisture issues. You propose an increase based on the eligible portion of the project.
- You upgraded common area fire panels and life‑safety systems. The work benefits the entire building. You allocate costs across all units and set out the per‑unit amount.
The P3D does not, by itself, raise the rent. It is a required notice that supports your application for an additional rent increase. It is also a tenant‑facing disclosure that demonstrates accuracy and fairness.
When Would You Use an RTB-53-P3D – Notice of Additional Rent Increase – Eligible Capital Expenditures (Phase 3 Details)?
Use the P3D after you complete Phase 1 and Phase 2 of the capital expenditures process and you are ready to present final figures. You should have final invoices, proof of payment, and a clear allocation method. You are now able to state the exact additional amount per unit and the period over which it will apply, subject to approval.
You use the P3D when the capital work is complete or at a stage where costs are certain. Estimates belong in earlier phases. Phase 3 must show actuals. You also use the P3D when you want to correct or refine earlier estimates, after receiving tenant feedback. If the scope or costs changed, Phase 3 is where you explain those changes.
Typical users include:
- A landlord who completed a major common area project that benefits all units.
- A property manager who oversaw the replacement of building systems that serve a vertical stack of suites and wants to allocate costs to that subset.
- An owner who bundled several smaller capital projects completed in the same period wants to propose a single combined increase.
Do not use the P3D for the standard annual rent increase. That is a separate process. Do not use it for routine maintenance, repairs due to neglect, or cosmetic upgrades that do not extend asset life. If the work is ineligible, it should not appear on the P3D.
You also should not use the P3D as a substitute for a Notice of Rent Increase form. Even after you complete Phase 3 and obtain approval, you still must serve the standard rent increase notice to implement any approved increase. Think of the P3D as a disclosure and calculation tool, not the final notice of change to rent.
Legal Characteristics of the RTB-53-P3D – Notice of Additional Rent Increase – Eligible Capital Expenditures (Phase 3 Details)
The P3D is part of a regulated process under the Residential Tenancy Act and policy. It is not a contract on its own. It is a procedural notice with detailed content requirements. Its legal purpose is to inform tenants and support adjudication. It helps ensure transparency and procedural fairness before any additional rent increase can take effect.
Is it legally binding?
The form itself does not bind tenants to pay more rent. It does, however, bind you to the details you present during your application. If you misstate costs, include ineligible items, or allocate unfairly, an adjudicator can reject or reduce your request. Your credibility on the P3D matters. It becomes evidence in the decision.
What ensures enforceability?
A valid order from the Residential Tenancy Branch that approves an additional rent increase. You obtain that order by following the full process, which includes proper service of the P3D, complete documentation, and a fair calculation. Only after approval can you serve a rent increase notice for the additional amount, with the required lead time. If you skip steps or serve improperly, the increase is unenforceable.
General legal considerations:
- Eligibility. Only capital expenditures that meet policy criteria can support an additional increase. Routine maintenance and repairs caused by wear and tear generally do not qualify. Work must provide lasting benefit, extend asset life, improve health or safety, or reduce operating costs.
- Timing. You must respect the required timelines for each phase, service, and effective dates. Late or early service can invalidate the process.
- Allocation. You must use a fair and reasonable method to allocate costs to units. Common methods include equal per‑unit, by floor area, or by bedroom count. Be consistent and explain your approach.
- Deductions. You must deduct any grants, insurance proceeds, rebates, or third‑party contributions from the claimed costs. You cannot recover the same dollar twice.
- Amortization. Eligible costs are amortized over a set period. Your proposed monthly amount should reflect that period and any annual caps set by policy.
- Tenant participation. Tenants can comment and raise concerns. Adjudicators consider tenant feedback, project benefits, and affordability. They can adjust amounts, timing, or scope.
- Record‑keeping. Keep invoices, contracts, payment proof, photos, permits, and warranties. Your supporting records should match the numbers on the P3D.
Treat the P3D as a formal disclosure. Accuracy and clarity reduce disputes and improve your chance of approval.
How to Fill Out a RTB-53-P3D – Notice of Additional Rent Increase – Eligible Capital Expenditures (Phase 3 Details)
You complete the P3D to present final project details and the proposed additional rent increase per unit. Follow these steps.
Step 1: Gather your records
Collect all documents you will rely on:
- Final invoices and statements from contractors and suppliers.
- Proof of payment (e.g., bank statements or receipts).
- Contracts, change orders, and completion certificates.
- Permits, inspection reports, and commissioning documents.
- Photos before and after, if available.
- Warranty or manuals for systems installed.
- Any rebates, grants, or insurance payouts.
Confirm that the work is complete and aligns with what you told tenants in earlier phases. If the scope changes, prepare a short explanation.
Step 2: Confirm eligibility and scope
List each project you plan to include. For each item, confirm it is a capital expenditure, not routine maintenance. Ask:
- Does it extend the useful life of the building or system?
- Does it improve health, safety, or energy efficiency?
- Is it a one‑time project with lasting benefit?
Examples that tend to be eligible: boiler replacement, roof replacement, elevator modernization, building envelope or window replacement, sprinkler or fire panel upgrades, major plumbing or electrical riser replacement. Examples that tend to be ineligible: patch repairs, painting, minor appliance swaps, landscaping, cleaning, or work due to deferred maintenance.
If a project includes both eligible and ineligible components, separate the costs. Only include the eligible portion in your calculation.
Step 3: Identify the parties and property
Complete the header fields:
- Landlord or agent name and contact information. Use the legal name on the tenancy agreement.
- Property address and building name (if any).
- Unit identifiers. List all units affected by the proposed increase. If some units are excluded, state why.
Accuracy here ensures proper service and avoids confusion.
Step 4: Describe each capital project
For each project, provide:
- Project title. Example: “Boiler Replacement – High Efficiency Condensing System.”
- Location. Example: “Central mechanical room, serving all suites.”
- Start and completion dates. Use actual dates.
- Contractor or supplier name.
- Summary of work. One or two sentences on scope and benefit.
- Eligibility rationale. State why it qualifies as a capital expenditure.
Be clear and concise. Avoid jargon. Link the project to benefits for tenants, like reliability, comfort, or safety.
Step 5: Present the cost breakdown
Create an itemized cost table for each project:
- Contract price.
- Change orders with descriptions.
- Taxes and required fees.
- Professional fees (engineering, permits), if directly tied to the project.
- Subtotals per category.
- Less deductions (rebates, grants, insurance).
- Net eligible cost.
Exclude finance charges, internal administrative costs, or penalties. If you purchased materials directly, include receipts and show quantities and unit prices.
If you used bundled contracts, allocate costs to each project or building based on a rational method. Explain the basis (e.g., square footage or meter counts).
Step 6: Choose and explain your allocation method
Decide how to allocate the net eligible cost to affected units. Your method must be fair and reasonable. Common approaches:
- Equal per unit. Works when all units benefit equally from common systems.
- By floor area. Larger suites pay more, reflecting proportional benefit.
- By bedroom count. Proxy for size and occupancy.
- By service stack. Only units served by a specific system share its cost.
Document your choice. Example: “Elevator modernization benefits all units equally. Costs allocated in equal shares per unit.” If multiple projects use different methods, explain each.
If units are vacant or subsidized, you still include them in the allocation. You cannot shift their share to occupied market units unless policy allows. Keep it consistent.
Step 7: Calculate the proposed monthly increase
Convert the allocated cost to a monthly amount per unit.
Your calculation must:
- Reflect any required amortization period for the type of capital expenditure.
- Respect any annual caps or maximum spread rules.
- Fit within the number of years you plan to apply the increase.
A simple way to present the math:
- Net eligible cost allocated to Unit 305: $X.
- Amortization period: Y years (explain policy basis).
- Annual recovery for Unit 305: $X ÷ Y.
- Monthly recovery for Unit 305: Annual recovery ÷ 12.
- Proposed additional rent increase per month: $Z.
If the per‑unit amount would exceed an annual cap, spread it over multiple years as needed. Show the schedule. Example: “Year 1: $12.00/month. Year 2: $12.00/month.” If different unit types have different amounts, show a matrix by unit or by class.
Round amounts consistently. State your rounding rule (e.g., to the nearest cent).
Step 8: Set the proposed effective date and duration
Choose a proposed start date that complies with notice requirements. Remember, the P3D is not the rent increase notice. You will still need time to obtain approval and then serve a proper rent increase notice with full lead time.
State the number of 12‑month periods you propose to apply the additional amount, if the policy requires spreading. If the amount will phase out after the recovery period, say so.
Step 9: Include tenant information and response process
Add a short tenant guide within the form:
- What is the additional increase for?
- How the per‑unit amount was calculated.
- Where tenants can view supporting documents (e.g., office hours to inspect invoices).
- How tenants can submit comments or concerns, and by what date.
- Contact details for the landlord or agent.
If you will hold an information session, include the date, time, and format. Offer a reasonable window for written comments. Keep the tone clear and respectful.
Step 10: Attach required schedules
Attach schedules to keep the form clean and readable:
- Schedule A: Project descriptions and eligibility rationale.
- Schedule B: Itemized costs, invoices, and proof of payment.
- Schedule C: Allocation methodology and unit list with calculations.
- Schedule D: Deductions (rebates, grants) with supporting proof.
- Schedule E: Photos, permits, and commissioning documents.
Label every page with the property address and a page number. Cross‑reference totals so a reader can trace each figure from invoice to unit amount.
Step 11: Review for accuracy and consistency
Before serving:
- Reconcile totals across all schedules.
- Confirm that deductions were applied correctly.
- Check that every affected unit appears in the allocation list.
- Ensure dates and names match tenancy agreements.
- Verify that the proposed amounts respect any caps and periods.
Have another team member review the package. Errors at this stage create delays or lost credibility.
Step 12: Sign and date
Sign the form as the landlord or authorized agent. Print your name and title. Date the form. If you are an agent, confirm you have written authority to act.
Step 13: Serve the P3D on all affected tenants
Serve the form and attachments on each affected tenant using a permitted method. Common methods include personal service, registered mail, or other approved delivery. Do not slip this step. Improper service can invalidate the process.
Keep proof of service for each tenancy. Record the date and method. If you serve by mail, account for deemed delivery timelines.
If a new tenant moves in after service but before approval, serve them as well. Every current tenant should have the details.
Step 14: Manage tenant feedback and questions
Respond to tenant questions promptly. Offer access to review invoices and key documents. Consider reasonable feedback. If you discover an error, issue a short addendum that corrects the record and serve it on all tenants.
Document all interactions. Professional, responsive communication helps at adjudication.
Step 15: Prepare for your application and hearing
Use the P3D and schedules as the backbone of your application for an additional rent increase. Your evidence package should match what tenants saw. Bring:
- The completed P3D and proof of service.
- All schedules and supporting documents.
- A summary statement of calculation and allocation.
- A log of tenant comments and your responses.
Be ready to explain eligibility, allocation choices, and how you respected caps and timelines. If approved, follow through by serving the standard Notice of Rent Increase for the additional amount, with full notice.
Practical examples and tips
- Roof replacement in a 24‑unit low‑rise. Equal per‑unit allocation is often reasonable. Show how you excluded minor patchwork done earlier that year.
- Boiler upgrade with utility rebate. Deduct the rebate first. Include commissioning documents to show the project is complete and the benefits are real.
- Elevator modernization serving half the building. Allocate only to the stack of units that benefit. Explain why other units are excluded.
- Window replacement by suite type. If window counts vary, allocate by actual window count or floor area, not equal shares. Explain your metrics.
Common pitfalls to avoid:
- Mixing ineligible maintenance costs with capital costs.
- Forgetting to deduct grants or insurance proceeds.
- Allocating costs to units that do not benefit from the project.
- Presenting estimates instead of final paid invoices at Phase 3.
- Serving the P3D late, or not keeping proof of service.
- Treating the P3D as the final rent increase notice.
Your goal is simple: show that the projects are eligible, the numbers are accurate, the allocation is fair, and the proposed amounts comply with policy. Do that, and you give your application a strong foundation.
Legal Terms You Might Encounter
- Eligible capital expenditure means a long‑term improvement, not routine maintenance. Think roofs, boilers, windows, or major electrical upgrades. On this form, you list only projects that extend the asset’s life or add value.
- Additional rent increase is an amount above the annual guideline. You use this form to justify that extra percentage. It ties directly to the costs you report.
- Amortization period is the useful life of the improvement. You spread the cost over that period. On this form, the period affects how much you can recover each year.
- Allocation method is how you spread costs across units. You might use floor area, unit count, or direct benefit. The form expects a clear, consistent method that you can explain.
- Common area improvement benefits more than one unit. Examples include roofs or heating systems. The form asks you to show how you allocated these shared costs to each unit.
- Unit‑specific improvement benefits one unit only. Think of a new appliance or a subpanel in one suite. The form requires you to tie that cost to the correct unit.
- Net cost is the total cost after credits, insurance, or grants. You cannot claim amounts you did not actually pay. The form expects you to show the final out‑of‑pocket figure.
- Completion date is when the work is finished and becomes usable. You use this date to set eligibility and timing. The form asks for it to confirm your timeline.
- Effective date of the increase is when the new rent starts. It must respect the required notice period. The form requires that date to align with service rules.
- Supporting documents are the records that prove your claim. Include paid invoices, contracts, proof of payment, and warranties. The form relies on these to verify your numbers.
FAQs
Do you need to include sales tax in your costs?
Yes, if you paid it and did not recover it. Use the amount you actually paid. If a credit reduced the tax, reflect the net figure. Keep the invoice showing the tax breakdown.
Do you need final invoices, or are estimates enough?
You should use final, paid invoices. Estimates are not enough for this form. If you only have estimates, wait until the work is complete and invoiced. Attach proof of payment for each invoice.
Do you include routine repairs, like patching drywall or fixing leaks?
No. Routine or cyclical repairs are not eligible. You must show a capital improvement with a lasting benefit. If a repair is part of a larger capital project, separate the repair portion and exclude it.
Do you need tenant consent for capital work to claim it?
No, not for this form. But you must show that the work was necessary and capital in nature. You also must serve a valid notice of the proposed rent increase. Tenants can dispute if they believe the work is not eligible.
Do you need to spread the increase across all units?
You must allocate fairly. If a project benefits the whole property, spread it using a fair method. If a project benefits one unit, charge only that unit’s share. The form asks you to document your method.
Do you have to reduce costs for insurance payouts or grants?
Yes. You can only claim what you paid out of pocket. Subtract insurance, rebates, and grants. Enter the net cost on the form. Keep documents that show those offsets.
Do you need to re‑serve the notice if a tenant changes before the effective date?
Yes, serve the new tenant if the tenancy changes. Ensure the correct names are on the notice. Recalculate unit‑specific allocations only if needed. Keep records of when you served each tenant.
Do you need to file the form anywhere after serving tenants?
Follow the filing instructions on the form. Some steps require serving tenants only. Some require filing with the authority. If filing is required, submit on time and keep proof of delivery.
Checklist: Before, During, and After the RTB-53-P3D – Notice of Additional Rent Increase – Eligible Capital Expenditures (Phase 3 Details)
Before you sign
- Final invoices for each project are marked paid.
- Proof of payment for each invoice, such as bank or card records.
- Contracts, scope of work, and change orders.
- Completion dates and photos showing finished work.
- Permits and inspection confirmations, if applicable.
- Warranties or commissioning sheets for equipment.
- A full list of units with current tenants’ legal names.
- Your allocation method and calculations by unit.
- A summary of total cost, offsets, and net cost.
- Amortization period used for each improvement.
- The proposed effective date of the increase and notice timeline.
- Any insurance, grant, or rebate documents.
- Your internal rent roll, current rent, and proposed new rent per unit.
During completion
- Verify the property address, PID or identifiers, and landlord details.
- Confirm each project title, description, and completion date.
- Enter gross cost, offsets, and net cost for each project.
- Apply a consistent allocation method across units.
- Double‑check unit‑specific versus common area allocations.
- Confirm amortization periods match the asset type and documents.
- Calculate the additional increase per unit using the form’s method.
- Check that the effective date meets the required notice period.
- Review tenant names and unit numbers for accuracy.
- Avoid rounding too early; keep cents in calculations.
- Ensure the form is dated and signed by an authorized person.
- Attach all required supporting documents, clearly labeled.
After you sign and serve
- Serve the completed notice to each tenant using an allowed method.
- Record how and when you served each notice.
- If filing is required, submit the form and documents on time.
- Keep stamped or confirmed copies of what you filed or served.
- Update your rent roll with the effective dates and new amounts.
- Set reminders for dispute timelines and hearing dates.
- Keep all records together for at least the retention period.
- Monitor for tenant questions and respond in writing.
- Prepare a summary sheet to explain calculations if asked.
- Update accounting to reflect the recovery schedule.
Common Mistakes to Avoid RTB-53-P3D – Notice of Additional Rent Increase – Eligible Capital Expenditures (Phase 3 Details)
- Misclassifying repairs as capital improvements. Replacing a gasket, patching paint, or clearing drains are repairs. Claiming them can lead to denial of the increase. Don’t forget to separate repair costs from true capital work.
- Using estimates or unpaid invoices. The form relies on final, paid costs. Submitting estimates risks rejection and delays. Don’t forget to attach proof of payment for each invoice.
- Incorrect or unfair allocation across units. Guesswork on square footage or benefit can cause disputes. An unfair split can be set aside. Don’t forget to document your allocation method and keep the backup.
- Forgetting offsets like insurance or rebates. Claiming gross cost without offsets inflates the increase. That can trigger a challenge or reduction. Don’t forget to show the net cost you actually paid.
- Missing the notice timeline. An effective date that is too soon makes the notice invalid. You may have to re‑serve and wait. Don’t forget to count days carefully and record the service.
What to Do After Filling Out the Form RTB-53-P3D – Notice of Additional Rent Increase – Eligible Capital Expenditures (Phase 3 Details)
- Serve tenants. Use a valid service method. Note the service date for each tenant. Keep copies of all notices served.
- File if required. Some processes require you to file the notice and documents. If you must file, do it within the stated timeframe.
- Track deadlines. Calendar the effective date and any dispute windows. Add reminders for hearings or submissions.
- Prepare to explain. Keep a one‑page summary of each project. Include cost, completion date, allocation method, and amortization period.
- Monitor responses. If a tenant asks questions, answer in writing. Refer to the numbers on the form. Provide copies of invoices on request, where permitted.
- Correct errors promptly. If you find a mistake, do not hand‑edit served copies. Prepare a corrected form. Re‑serve tenants and re‑file if needed.
- Keep everything. Store the form, invoices, proof of payment, and service records. Keep records for the full retention period.
- Implement the increase. On the effective date, update rent ledgers and payment systems. Confirm the new amount in writing on the next rent receipt.
- Adjust budgeting. Track the recovery period and remaining balance. Update your capital plan and schedules accordingly.
- Review future cycles. Note lessons learned on documentation and allocation. Build a standard package for the next project.
Disclaimer: This guide is provided for informational purposes only and is not intended as legal advice. You should consult a legal professional.